Showing posts with label diy. Show all posts

Friday, February 1, 2013

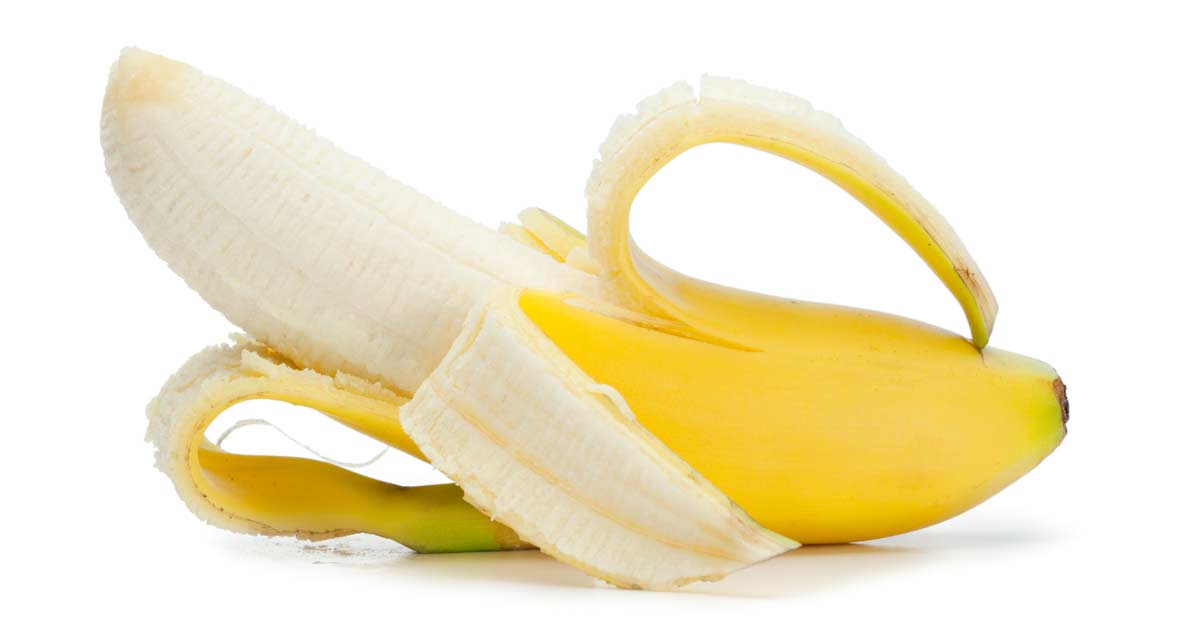
Tighten Pores With Banana Peel!

Image from: foodfacts.mercola.com


Apparently, banana peels aren't just for slapstick comedies. We have all heard about the benefits of bananas. (If you haven't, I suggest you read this article, 14 Banana Health Benefits You Might Know About). But did you know that the peel can tighten up your pores?

I was surprised when I read it somewhere over the Internet. (I'm so sorry I wasn't able to trace the link yet. I'll keep looking!) Anyway, they said that banana peels can tighten pores. I tried it myself and I'm very impressed. VERY IMPRESSED.

What you will need:

1 banana peel (Given the benefits of having banana in your diet, you might as well be the person who eats it.)

What to do:

Apply inside of peel gently all over face, especially the area where you want smaller pores. Do not rub.  Leave it for 10-15 minutes before washing face. Cleanse, tone and moisturize like usual and see the results yourself!

I have huge pores on my nose and upon doing this I observed that my pores were smaller! It's so easy, it's so worth doing! Try it and let me know how it works for you! I am so stocking up on bananas! Good for the brain too!

Say Goodbye To Dandruff With Olive Oil!


Image from: time.com


Dandruff, it’s everyone’s mortal enemy especially when you wear those slimming dark-colored shirts. And since none of us has really bounced back from our pre-holiday weight, this can be a conflict of interest. (If you have bounced back quickly, please share your secret to the rest of the class.) You may look slender because of the illusion of dark colors but you’re going to be just as insecure because of the flakes on your shoulders.  And with the bipolar weather that’s warm in the day and cold at night (at least here in the Philippines), this can be a major dandruff problem or worst the flu. But the flu’s a different blog post.  

So what’s the best solution for dandruff? Why, hot oil, of course! But I’ve always dread going to the salon except for the occasional hair cut and hair coloring because when I go to the salon, instead of feeling good about myself, I feel worst because they tell me to have my hair straightened and they enumerate all these treatments that will make it all better. Nothing wrong with up-selling but don’t make it so obvious that you only care offering these services because you want us to spend our money. Where is the sincerity?

But enough of my ranting, here are hot oil  and hair spa procedures that you can do at home that’s just as effective, not as expensive and natural! 

Hot Oil

What you will need:

Olive oil (1 tsp or more as needed)
Cotton
Hair clamp (for sectioning hair)
Kerchief you can use as head scarf

Procedure:

  1. Section hair and clamp hair that you want out of the way.
  2. Moisten cotton with olive oil and apply to scalp gently. Do this until you have covered entire scalp area. With the leftover oil, damp cotton and apply some on your hair too.
  3. Cover your head with a kerchief. Preferably, this should be done at bed time so you can leave it overnight. The kerchief is used so that the oil doesn’t go to your pillow. Don’t tie the kerchief too tightly on your head. It’s said that sleeping with your head covered is bad for the brain.
  4. The next day, shampoo twice. Dandruff will be visually reduced.


Hair Spa/Hot Oil

If your scalp needs exfoliating, this is the better recipe. 

What you will need:
Brown Sugar (1 tsp)
Olive oil (Enough to cover brown sugar)
Cotton
Hair clamp (for sectioning hair)

Procedure:

  1. Section hair and clamp hair that you want out of the way.
  2. Moisten cotton with olive oil and sugar then apply to scalp gently. Do this until you have covered entire scalp area. Focus on the areas where you can visibly see flakes on scalp.
  3. Immediately, shampoo twice. Dandruff will be visually reduced.

For better results, you can do the hot oil and do the quick hair spa the next day.

I’ve tried a lot of DIY hot oils but they always leave my hair damp for days and I have thick hair. But this one did the job and didn’t leave my hair damp at all. Definitely doing this again, with or without dandruff!

Sunday, October 28, 2012

How to Make Your Feet Happy: DIY Minty Foot Soak

Image from: pregnancy.healthguru.com


Our feet are the most neglected part of our bodies. We subject it to horror stories like breaking in new shoes (how often are those shoe sales?), brisk walking or running or standing for hours in heels, keeping it in closed shoes, and sometimes, washing it before it’s given enough time to rest. Yes, our feet needs a break from the daily stress of we subject it to. And you can be grateful to it naturally, organically in the comfort of your own home.

What you will need:

About 2 tbsp. Mint leaves (any kind)
½ c. Organic Sea Salt
Basin
Hot Water
Additional water to temper the water

What to do:

  1. Place hot water in basin and add the mint leaves. Make sure you wash the leaves prior to adding it to the basin. Just wash it with water. Leave the leaves to steep for about 10 minutes.
  2. Add the salt.
  3. Test the water’s warmth. Make sure it’s bearable for your feet. You may add as much water as you’d like to temper it but keep it warm.
  4. Watch TV and enjoy this soak for 15 minutes. Dry feet with towel.

It was truly a treat for my very tired feet as it was detoxifying because of the salt. It left a mild minty smell on my feet and a mild coolness to it too. It goes without saying that I was so relaxed and I slept so well that night. I used Java mint leaves.

Get your Peppermint at Php60/seedling. 
Visit https://herbalandherbs.wordpress.com/ for more details. 

Now you can be grateful to your feet, home spa style at a fraction of the cost and a surplus of love. 

You can also opt to do a sugar scrub (for directions, click here) for an instant hand and foot scrub. Your hands and feet deserve it and you don’t have to go to the salon for it! 

No mint plants at home? 
Visit us at https://herbalandherbs.wordpress.com/ for organic culinary and medicinal herbs.

Wednesday, October 3, 2012

Japanese Mint Facial Steam & Salt Scrub

I've been meaning to have a steam bath. The last time I did it, I placed Eucalyptus essential oil from Body Shop. And boy, was that steam bath intense! My face sweated profusely and because I accidentally dropped too much Eucalyptus oil (Please don't make the same mistake), it was a little too hard on my nostrils. 

So this time I was a little determined to make it more enjoyable. I asked my mom for some mint leaves and she introduced me to one of her new toys. Meet Japanese Mint. The leaves pretty much look the same as the other mint family but the taste is definitely milder. I used mint for this facial steam because according to some websites it's good for acne and perfect for oily skin. 


So you'll be needing 2 tablespoons of leaves. Just eyeball it. To me, it's this much. Wash it with water. 


Boil about a cup of water in a sauce pan. Turn off fire, and add leaves. Steep for 10 minutes. 


This is how it will look like. 


Put sauce pan in a table. Put a towel over your head above the sauce pan. You'll be chilling out for 8-10 minutes (for oily skin) or 3 minutes (dry skin). 

After the facial steam, your pores are open. It's the perfect time to exfoliate! I use salt-coconut oil scrub to match the detoxifying effects of facial steam. Just eye ball the mixture or use 1/2 tsp. and enough coconut oil to cover the salt. Here's what mine looks like. 


Facial steams have plenty of benefits. It improves blood circulation that leaves a rosy glow, helps exfoliation and it's detoxifying. It also helps in nasal congestion and headaches caused by colds. But be wary that not everyone can benefit from facial steams. Check out the article Benefits of Face Steaming for more information. 

Get your Peppermint at Php60/seedling. 
Visit https://herbalandherbs.wordpress.com/ for more details. 

As for me, I enjoyed doing my own facial steam. It was mild unlike my first attempt. The salt scrub is also wonderful. I kind of wish I had organic sea salt though. It left my skin is smooth and soft after and moisturized because of the coconut oil too so it's like exfoliation and moisturizing in one. I'm certainly doing this again! I can't wait to do my own makeshift sauna/body steam next!

Thursday, March 22, 2012

Lighten Skin with Lemon & Salt Bath

Last night I was showing my mom the effect of my trial homemade bronzer, which was basically just cocoa powder brushed on my cheeks. I even went under the light so she can see clearly. But instead of noticing my bronzed cheeks, she noticed how clear my skin was. 

Days before she told me as I was under the light that I had eruptions and last night she told me otherwise! I do tea baths almost everyday but yesterday I did something completely different. I bathed in lemon with salt. (We're missing the Tequila here!)

I heated some water, added about 9 Kalamansi (Philippine lemon) and added the salt after turning off the heat. Salt will make it hard for the heater to do its job because of its cooling effects.  

My hair was shiny but it wasn't as soft or manageable as when I did my Stevia, Java Mint and Chamomile bath. But it was very shiny. My skin look like it lightened too. I wear T-shirts a lot and the sunburn just below my collar bone is a mainstay for me. But after doing this, my skin visibly lightened in this area. It is not suggested to do this bath everyday because it might be harmful. But if you want lighter skin and clearer complexion, lemon and salt are your kitchen-go to.

Photo from: http://www.ericcressey.com/sodium-intake-is-salt-bad-for-you

Sunday, March 18, 2012

Java Minty Tea Bath

I had a lot of Java mint spare when my parents harvested for the Fresh Mint Chocolate Chip cookies and the Mint Chocolate ice cream I made for them so I figured why not air dry it and make a tea bath out of it. 


This baby came from my mom's garden. Pretty thing, isn't it? Smells great too. 

Air-drying takes about 3 days. I used about 3 tbsps. worth of dried leaves before putting them in boiling bath water. I left it to boil for another 20 minutes. At around 15th minute, the house was filled with the sweet, refreshing smell of Java mint. My mom noticed it first. I completely forgot about heating the water with tea leaves in it. Ha! This is why I do not cook! But, it was incredible like a whole-house aromatherapy session. But the smell just doesn't stay too long. Too bad. 

The bath was incredible. I currently use mentholated shampoo because when it changes weather a lot, I tend to get dandruff. What I notice about Java mint bath is that it's not as mentholated as what we use in commercial shampoos and body washes. It's a lot milder and the smell doesn't stick so long as all good things but the effects are to be in love with. My hair was really shiny and soft and manageable right after and no itch! I had my mom feel my hair and she said it was like a horse's. And I take that as a compliment. 

After talking about a lot of tea baths here, you might think that all tea baths are made the same. Well, no. I'm just lucky that so far because I've tried good teas that have great effect on hair and body. My mom has tried Lagundi tea bath, although it has warmed her entire body on cold days, it didn't make her hair look as nice. So not all tea baths are made the same but I am starting to believe that all are awesome for skin. I haven't used lotion for weeks (apart from the fact that it's summer)  and I can tell you it's far from being dry. 

Thursday, March 15, 2012

DIY Stevia Tea Bath

So another of the tea bags that I have totally forgotten and just expired are the free samples given to me by an organic Stevia gentleman farmer I met. 

And it would be a waste to throw away like the Expired Organic Chamomile tea bags I had. So I did a little research. According to Wisdom of the Ancients, Stevia can heal cuts and sores. It is said also to smoothen wrinkles and make skin soft when they dry from this tea rinse. A woman also claims that it removes aches and pains when put in the bath and is just as relaxing. It's also a good hair conditioner that helps retain hair color and makes the hair stronger. Just leave the rinse at the bath for 5 minutes. 

With my expired Stevia tea bag, it's time to try this ancient secret to sweetness and beauty.

What you need:


Hot bath water
Stevia tea bags (enough to color water)

Steep tea bags for 15 minutes. Remove the tea bags and enjoy. Tea bags may be reused 5 times.

Review:


It's indeed relaxing but it didn't have the extremely calming effect as the Chamomile bath I had last night. I almost fell asleep through dinner. And it did get  my aches and pains I have or maybe it's the hot water. As for the effect on hair, it didn't turn out as soft as the chamomile bath but the shine of my hair was fantastic and it managed to calm my curls. Definitely a must do! Can't wait to do a chamomile-stevia fusion bath!

This is what it looks like when it's fresh by the way.

Get your Stevia at Php60/seedling. 


DIY Yakult-flavored Yogurt

I was supposed to try out making yogurt but since I forgot to buy yogurt at the grocery store for my starter set and we have Yakult, I decided to make Yakult milk instead.

I wanted a really CREAMY yogurt so I bought my favorite powdered milk, Bear Brand. But creamy Yakult milk, is another thing worth trying.

Since I baked fabulous Fresh Mint Chocolate Chip cookies and making Yakult milk needed oven assistance, I decided to make it after the baking. 

What you're going to need:

1 liter of water
1 pack of 300 g. powdered milk of your choice
1 pc. Yakult

Oven

1. Preheat your oven to 250 degrees Celsius. (Better if you bake first so it's more economical.)
2. Mix the three ingredients together in oven-proof bowl. Put in oven at 250 degrees then turn off the oven. 
3. Leave mixture undisturbed for 12-14 hours. This is what it looks like after 12 hours.


And when you mix it, you will see some formed lumps.


4. Chill for 2 hours and enjoy! Add sugar if you want to taste.


Review:


The consistency reminds me of cottage cheese that's more runny.


It has the tangy taste of yogurt and the aftertaste of Yakult without the sugar. Definitely, an acquired taste. Sugar makes it easier to down just make sure you dissolve the sugar well.  But the health benefits make it totally worth it. For more information on Yakult, visit http://www.yakultusa.com/. Cheers to healthy intestines!

Wednesday, March 14, 2012

DIY Fresh Mint Chocolate Ice Cream

A new twist to an already tested recipe! I've posted before about DIY Ice Cream.  I've always wanted to try mint ice cream and since my parents have java mint (also used on my DIY Fresh Mint Choco Chip cookies), I thought I might as well make ice cream. 

What you will need:

2 all-purpose cream
20 fresh Java mint leaves
1 can condensed milk
1 c. chopped chocolate

So same recipe as DIY ice cream only difference is that we'll be heating the cream in a sauce pan in low fire with 20 leaves of Java mint. Do not boil. Keep stirring the cream until there are bubbles at the side of the pan. Remove from heat and cover pan for 30 minutes. This is what you call steeping. The same thing is done when you make tea. 

After 30 minutes, sift the tea leaves and press it down so all the flavor will go to the cream. Refrigerate cream for about 2 hours or until it looks thick and not runny. Whip it until soft peak. Add chocolate chips to your condensed milk and fold into whipped mint cream. Refrigerate for 6 hours or until it has solidified.

Get your Peppermint at Php60/seedling. 
Visit https://herbalandherbs.wordpress.com/ for more details. 

I got this idea from Simply Recipes and merged it with the easy recipe I got. Turned out well except that again, I dread bittersweet chocolate. (Just a little more and the bittersweet chocolate will all be gone from the pantry. *Evil laugh*)

But it does look good, doesn't it?


What to do with Expired Chamomile Tea Bags

Our next door neighbor gave us a box of organic chamomile tea bags from London about a year ago. But being busy people that we are, we forget things. And two days ago I found out that it already expired.

Photo from: http://www.whittard.co.uk/tea/herbal/organic_camomile_caffeine_free_herbal_25_teabags.htm
Honestly, I found it a waste to just throw it away so I found a different use for it that's just as effective as the oral intake. I used it in my bath. 

I placed in hot bath water 3 bags of this baby. I shampooed and scrubbed with loofa and rinsed out with chamomile tea.  


I knew of the calming properties of chamomile as a drink and as an essence but as a tea bath, who knew? I was so relaxed right after, you'd think I came from the spa. 


I was well-aware that chamomile can be used for highlighting hair for blondes but not of the other benefits of bathing hair with chamomile tea. My hair was so soft and shiny after. Conditioner got nothing on chamomile tea! And it is said to lighten eye bags too. I have yet to try this!

Which reminds me, I have expired stevia tea bags too - but that's another story. Expired tea bags rock!!! 

DIY Fresh Mint Chocolate Chip Cookies (Sugar-free)

A friend of mine has been requesting mint chocolate chip cookies from me for the longest time and it is only now that I found the time to finally try making them. Sure there are available mint food essence available in the market but fresh is always better! And since my parents have an herb garden, I might as well take advantage!

Get your Peppermint at Php60/seedling. 
Visit https://herbalandherbs.wordpress.com/ for more details. 

I got this recipe from Une Gamine dans la Cuisine

Group A:
1 1/2 cups of all-purpose flour
1/2 tsp of salt
1/4 tsp of baking soda

Group B:
1/2 cup or 113 g. unsalted butter, at room temperature
165 g. coconut sugar
1 egg
1 tsp. pure vanilla extract

Group C:
1 cup of semi-sweet chocolate chopped
1/4 cup of chopped fresh mint leaves (or food processed)

1. Sift Group A together. 
2. Cream butter and sugar for 10 minutes (KitchenAid speed 4). Add egg and vanilla then mix for 30 sec. (KitchenAid speed 6). 
3. Add Group A to creamed mixture in 3 additions. Mix only until no traces of flour can be seen. Scrape sides as needed. 
4. Add Group C and fold manually until well incorporated. 
5. Refrigerate for 3 1/2 hours. But you can chill for 30 mins if you cannot wait. (I couldn't wait.)
6. Scoop dough (approx. 1 tbsp./ pc.) in greased cookie sheet. Put flour in scoop as needed so that dough doesn't stick. Place cookie dough one inch apart each other in cookie sheet.  
7. Bake at preheated oven temperature 180 degrees Celsius for 7 minutes. Leave in cookie sheet for 10 minutes before transferring to cooling rack. 

Makes 20. 

Recipe Review:

I think I've mentioned in my  post for DIY ice cream that I'm not a big fan of chocolate cake or ice cream. It's the same with cookies but it's always nice to bake for your mom who worships chocolates, yes? 

What I don't like about my first attempt is the fact that I used bittersweet chocolate. It was the only thing available in the pantry. I'm weak against bitter stuff because I'm sweet. Ha ha! My mom loved it though. She's a sucker for all things bitter. Eew. 

I like how the cookie is firm on the sides and chewy and wonderfully moist on the inside. The green patches are not as visible when you see the cookies in person. I used flash for this photo. 


I guess the only down side to using fresh mint leaves in your cookies is that it tends to get stuck between your teeth. But if minty fresh breath after a sweet treat is what you are after, this cookie will not disappoint. Will definitely make them again but this time with semi-sweet chocolate.

Get your Peppermint at Php60/seedling. 
Visit https://herbalandherbs.wordpress.com/ for more details. 

Monday, March 12, 2012

Eggs: Also for Bouncy Hair

My mom recently bought a book entitled Herbal Home Remedies by Jude Todd. 

Photo from: http://www.paperbackswap.com/Herbal-Home-Remedies-Jude-C-Todd/book/8180565505/


I totally worship this book! I mean it's amazing and I can't wait to try out all the interesting stuff written here and share it with all of you! And the best thing is my mom has this herbal garden business so getting my hands on those herbs are easy, breezy and free. I'm such a lucky girl!

Today, I'm posting a review on this book's shampoo substitute. And I bet every person reading this can do it as soon as they read it. 

What you need: 

Egg
Vinegar-rinse

Photo from: https://www.organicbuyersgroup.com.au/shop/index.php?main_page=product_info&products_id=740


All you have to do is beat the egg before taking a bath. Massage it on your scalp. I like to leave it on while I soap myself and then rinse my hair with the vinegar-rinse and water.

As for the vinegar-rinse, use the recipe here. But instead of using everything, put it in your empty and clean shampoo bottles so you can use it every time you need it. Pour enough vinegar-rinse on your hair then rinse with water. Do this twice a week. 

So what I thought of it? After my bath, my hair already felt different. It felt thicker and heavier. I did this shampoo substitute for two consecutive days. If there is something to complain about this recipe, it is that the egg smell stays even with the vinegar. So you better wash really well.

I remember when I was a teenager, my mom and I would put mayonnaise on our hair and it would come out just beautiful. Mayo is basically eggs and olive oil. So maybe egg really is the secret! 

When making leche flan, we put  lemon or lime to remove the smell of eggs. Maybe I should try putting vanilla. Leche Flan scent on my hair. Hmm. 

Photo from: http://muchamunch.wordpress.com/2012/02/13/i-heart-leche-flan-2/
      
I didn't really notice the wonderful effects of this shampoo substitute until I was back to using my commercial shampoo. My hair was manageable even if it's just air-dried. I'm also doing DIY Highlights and after this shampoo substitute, I could see that my hair has really lightened! Biking under the sun has really paid off! And to add to this, my hair is shiny and tangle-free! And I don't brush because I have curly hair. 

All in all, I love this DIY shampoo. I'm definitely doing this twice a week and I'm adding lemons and vanilla.  Leche flan-scented hair anyone?  

Wednesday, March 7, 2012

DIY Highlights

I have a confession to make. I'm terrified of going to hair salons and this is probably why I am doing all the DIY stuff (except for the haircut) so that I wouldn't have to go. When you go to the salon, it's usually to feel good about yourself. I don't know if it ever appeared to you in this way but notice when you go to salons you feel picked on (at least at the salons I've been to). 

I have naturally curly hair and there was a time when rebond was all the craze. Oh my formative years. When I go for a haircut, the person doing my hair does nothing but rip my self-esteem by telling me to have my hair done straight. For awhile I followed their advice until I realized that they were not after my welfare when they suggested this to me. My hair got damaged and I had to grow it out to its former glory. 

Until now, when I go to salons I am still being told to do the same. But after that really bad experience, I know better. And if you want something done right, you gotta DIY, love!

Summer's around the corner and what better way to start feeling it than to have HIGHLIGHTS on your locks. I have black hair - not really the jet black type because when I'm under the sun it reveals a light brown color. Since I'm all for the natural stuff, I did my research on highlighting hair naturally. And all of them say the same thing, use LEMONS!

Photo from: http://kas2ri-kas2ri.blogspot.com/2009/06/limau-kasturikalamansi.html

We have American lemons here but I think our native Calamansi will do just fine. 

I've experimented on this just this morning. Below is the list of what you will be needing:

1 cup water
4 tbsp. Kalamansi (approx. 16 pcs.)
Sunblock
Sun

Photo from: http://rainbowsunshinekittens.tumblr.com/


You simply mix them together, go for a bath and use this as a last rinse over your head. Then put sunblock and bask under the sun for thirty minutes. After that rinse with water and dry! 

What I like to do is go out to bike around the village at 8:30 AM. The sun will be up and about by then and it's exactly 30 minutes away from the sun being harmful. I not only burn 109 calories according to this calorie calculator, I also get my much needed Vitamin D, a tan, thigh muscles and my highlights on! Definitely better than sitting for an hour to two hours in the salon while reading magazines or watching TV! And mind you lemon is also skin lightening and a wonderful astringent for your face so that's like doing three treatments in one! Just don't let it get to your eyes!

Of course, the effects are not as immediate as with the salon. So I might be hallucinating a bit when I find my hair a little lighter when I saw it a minute ago against the light. The best way is to do this once a week for four weeks. Lemon is very acidic and may dry hair (and your skin!) if you do this everyday. Patience is a virtue. 

Some websites say that you will have blisters on your head if you do the last rinse method for this but I've just tried it this morning and no, none of the pain they were saying. But if you are still not sure about this, you can put the concoction in a spray bottle and spray away so lemon juice won't hit your scalp. 

If you have time to spare, you may also want to try honey and olive oil. You can check how it's done here. I've tried them both. I didn't enjoy it though because olive oil is again too greasy and honey makes the ants go crazy in my bathroom. But honey does make your hair feel softer. I can't wait to try the beer treatment but I think this would be best with a girl friend so you can drink and bash old boyfriends so early in the morning together. 

I'm continuing this treatment until the four weeks are up. Just in time for April! Can't wait how it turns out!

Tuesday, March 6, 2012

DIY Hand and Foot Spa

In my last post about Sunflower Oil, I sort of bashed Olive oil and I feel bad about it. So I'm posting it to make up to it! Ha ha!

I was in National Bookstore when I read from a beauty book about Sugar scrub. Now, I don't know about you but it was the first time I've heard of it because when I go to the spa or nail salons, all I ever get are salt scrubs with different scents like strawberry and mint. The idea of a sugar scrub was already very attractive to me since I am a sweet tooth. I tried it as soon as I got home and all I can say is I loved it.

What was so good about it was it was so easy to prepare. It's just olive oil and sugar. I didn't measure it anymore. You can already gauge by looking. There has to be more sugar than olive oil but you have to make sure that the sugar is coated by enough olive oil.

I first scrubbed my feet. It's like an automatic 2-in-1 hand and foot spa because it works your hand and foot at the same time. I'm so ticklish so I rarely have a foot spa done. I thought if I did it myself, it wouldn't tickle as bad but it still did. After this self-pampering, I was the happiest person on earth. My feet and hands were as soft and smooth as my face. I wish I was kidding too but no! It's really true.

There were additional instructions like put a drop of olive oil in your hand moisturizer before applying before bed and to cover hands with cotton gloves and feet with socks but I didn't go the extra-mile anymore. I was pretty content. I was exfoliated and happy. My friend does a sugar scrub on her body once a month and she said it's just as great. I tried it but I find the clean-up a little problematic with all the ants around. I guess that's why salt scrubs make better body scrubs than sugar. But for my hands and feet, I go sugar all the way!

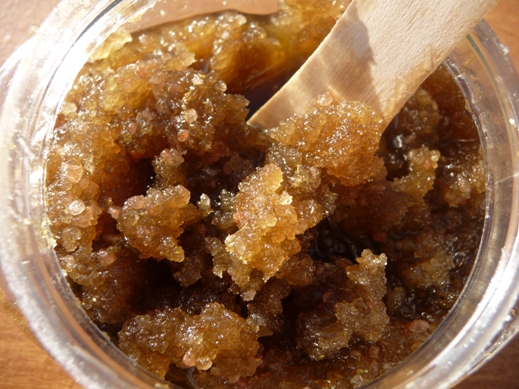
I used white sugar for this one but that's because I am not using Muscovado or Coconut sugar yet. That's your organic option. When I finish all my white sugar, I'm trying out any of these two brown sugars next. Looks luscious and sinful, don't you think?

Photo from: http://mysocalblog.com/2012/02/diy-%E2%99%A5-beauty-%E2%99%A5-brown-sugar-body-scrub-recipe.html