Showing posts with label baking. Show all posts

Sunday, June 17, 2012

Beignets for Father's Day!

I had no idea what Beignets (pronounced as Ben-Yay) were until... I watched The Princess and the Frog. And since I am my dad's not-so-little anymore Disney Princess (he bought me a collection of Disney movies when I was a kid), I thought it'd be fitting if I made him Beignets. I don't know if you see the logic here. But it's there somewhere. Ha ha!

I tried making Giada de Laurentiis' Italian Zeppoles before which are like Beignets. They are essentially donuts with no holes or fritters. Zeppoles look more like munchkins and Beignets look like this. I didn't like Giada's recipe though because it was so... egg-y. It smelled of egg even with vanilla. 

Photo from: http://cuzilovefood.tumblr.com/
But I did find an easy and delicious but not as pretty recipe for Beignets! Thank you Food.com for this recipe! Click here for the recipe!

This is how mine turned out. 


Instead of nutmeg, I used a pinch of cinnamon. And I drizzled some honey before putting confectioner's sugar (just like Tiana's ha ha!) It tasted so good! There's a little crunch on the outside and it's soft on the inside. And it's perfect for rainy days especially when you eat them piping hot. We did this last night. One of the best feelings in the world! I just love it! 

I can't wait to make them again! It may not be as pretty as the authentic ones but it's a quick fix. As for taste, they say it comes pretty close! I'm glad I found this recipe. I'm stocking up on the ingredients so every time I need it, I'll just make my own! Try it yourself and let me know how yours turn out! Enjoy!

Wednesday, March 14, 2012

DIY Fresh Mint Chocolate Chip Cookies (Sugar-free)

A friend of mine has been requesting mint chocolate chip cookies from me for the longest time and it is only now that I found the time to finally try making them. Sure there are available mint food essence available in the market but fresh is always better! And since my parents have an herb garden, I might as well take advantage!

Get your Peppermint at Php60/seedling. 
Visit https://herbalandherbs.wordpress.com/ for more details. 

I got this recipe from Une Gamine dans la Cuisine

Group A:
1 1/2 cups of all-purpose flour
1/2 tsp of salt
1/4 tsp of baking soda

Group B:
1/2 cup or 113 g. unsalted butter, at room temperature
165 g. coconut sugar
1 egg
1 tsp. pure vanilla extract

Group C:
1 cup of semi-sweet chocolate chopped
1/4 cup of chopped fresh mint leaves (or food processed)

1. Sift Group A together. 
2. Cream butter and sugar for 10 minutes (KitchenAid speed 4). Add egg and vanilla then mix for 30 sec. (KitchenAid speed 6). 
3. Add Group A to creamed mixture in 3 additions. Mix only until no traces of flour can be seen. Scrape sides as needed. 
4. Add Group C and fold manually until well incorporated. 
5. Refrigerate for 3 1/2 hours. But you can chill for 30 mins if you cannot wait. (I couldn't wait.)
6. Scoop dough (approx. 1 tbsp./ pc.) in greased cookie sheet. Put flour in scoop as needed so that dough doesn't stick. Place cookie dough one inch apart each other in cookie sheet.  
7. Bake at preheated oven temperature 180 degrees Celsius for 7 minutes. Leave in cookie sheet for 10 minutes before transferring to cooling rack. 

Makes 20. 

Recipe Review:

I think I've mentioned in my  post for DIY ice cream that I'm not a big fan of chocolate cake or ice cream. It's the same with cookies but it's always nice to bake for your mom who worships chocolates, yes? 

What I don't like about my first attempt is the fact that I used bittersweet chocolate. It was the only thing available in the pantry. I'm weak against bitter stuff because I'm sweet. Ha ha! My mom loved it though. She's a sucker for all things bitter. Eew. 

I like how the cookie is firm on the sides and chewy and wonderfully moist on the inside. The green patches are not as visible when you see the cookies in person. I used flash for this photo. 


I guess the only down side to using fresh mint leaves in your cookies is that it tends to get stuck between your teeth. But if minty fresh breath after a sweet treat is what you are after, this cookie will not disappoint. Will definitely make them again but this time with semi-sweet chocolate.

Get your Peppermint at Php60/seedling. 
Visit https://herbalandherbs.wordpress.com/ for more details. 

Tuesday, March 13, 2012

DIY Yellow Cake with Cookies 'n Cream Frosting

I've been a sucker for cookies 'n cream. When I was about 9 or 10, my dad came home with a lot of Hersheys cookies 'n cream chocolates. I devoured a bag on a one-way day trip. It's just really weird because I'm a big fan of white chocolate but not of Oreos. 
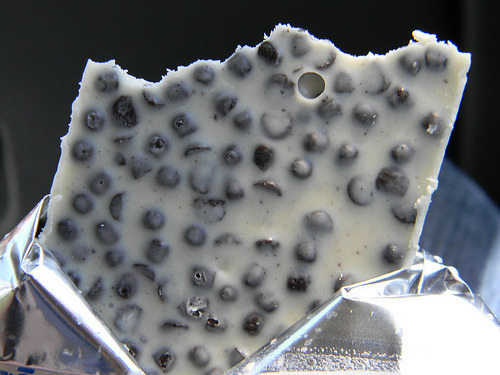
Photo from: http://-foodporn.tumblr.com/post/22577889546
I'm still no fan of oreo, but cookies 'n cream? Count me in, most definitely! 

I'm also a HUGE fan of yellow cake so I married these two favorites in one, which was an amazing experience like falling in love for the first time. 

I used Smitten Kitchen's yellow cake recipe which was intended for caramel cake but I haven't perfected caramel yet. Wait and see, caramel, I shall get you right soon! 

For the yellow cake

Group A:
2 c. cake flour
1 tsp. baking powder
3.4 tsp. baking soda
1/2 tsp. salt

Group B:
1/2 c. or 100 g. butter (at room temperature for 30 mins.)
3/4 c. or 160 g. white sugar
2 large ORGANIC eggs
1 tsp. vanilla

1 c. buttermilk

1. Preheat oven to 180 degrees Celsius. Grease an 8-inch square pan, put parchment paper and grease paper. I like using my 9-inch round pan for this recipe instead.
2. Sift together Group A.
3. Cream butter and sugar for 10 minutes (KitchenAid mixer speed 4). Add one egg at a time and mix (KitchenAid mixer speed) for 30 seconds. Add vanilla with last egg and mix. 
4. Add all the buttermilk and mix. 
5. Add in Group A to mixture in 3 additions. 
6. Put in pan and rack pan to rid of air bubbles. 
7. Bake for 35-40 minutes or until the toothpick comes clean.
8. Cool in pan for 10 minutes before transferring to rack. 
9. Cool for an hour before frosting. 

Important: 

I studied baking before and never in my life was the liquid (buttermilk in this instance) added first before the dry ingredients (flour, baking soda, baking powder, salt). But it totally works with this recipe so don't deviate, otherwise there will be a lot of holes in the cake. Trust me, I know. I've tried. 

Organic eggs: 

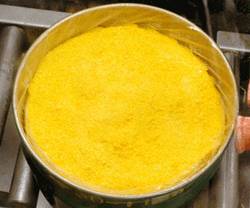
You have the option of using ordinary eggs but I tell you organic eggs make a lot of difference. I'm sure some of you know that yellow cake gets their color from the yellow of the egg. Let me tell you ordinary egg yolks pale in comparison with organic egg yolks. Not only is the color better, the cake is so much fluffier also! I haven't tried organic eggs with chiffon cakes but I can only imagine how wonderful it would be! I can't wait!

Photo from: http://en.wikipedia.org/wiki/Yellowcake

Not my picture. Ha! I really have to take pictures of the goodies I bake before they're gone. 

For the frosting, I used Bake Space's wonderful cookies and cream frosting. 

1/2 c. or 100 g. unsalted butter
1 3/4 c. or 190 g.  powdered sugar
pinch of salt
1/3 c. or 80 g. whipping cream
1/2 tsp. vanilla
crushed oreos

1. Cream butter and powdered sugar and salt. 
2. Add whipping cream and vanilla. 
3. Fold oreos. 

Crushing oreos: I use my food processor to make oreos into a powder. I not only put it in the frosting, I'd like to top the cake too with it. So yum! 

Craving!!!

Below are some ingredient substitutes you can make:

For the cake:

Cake Flour (1 cup)
2 tbsp. corn starch + all purpose flour to make 1 cup

Buttermilk (1 cup)
1 tbsp. vinegar + skim milk

For the frosting:

Whipping cream
Use all-purpose cream

Computing calories:

Yellow cake (accdg. to Calorie-charts) = 245.28/slice
Cookies 'n cream frosting (accdg. to Food) = 235.2/slice
Total = 481 calories/slice of this delish recipe

At this point, I really don't care about the calories, I mean if you've tasted it, you'll know it's worth it! But in case you are trying to lose some weight, here are 
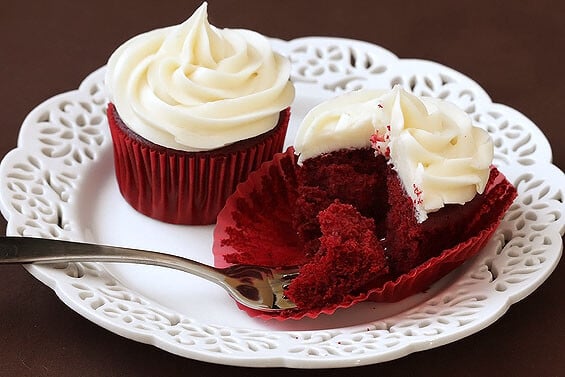
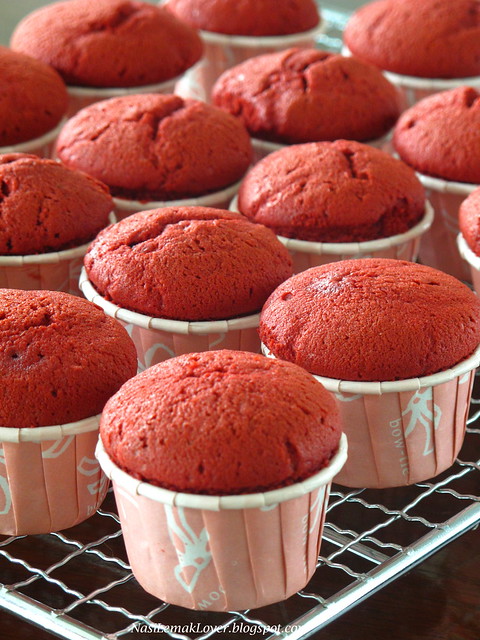
activities you can do to rid of yourself the guilt trip. And as I've mentioned in my red velvet cupcake post, you can burn 168 calories just by baking (and cleaning up. It's really part of it.) 

So get up bake and enjoy!

Monday, March 12, 2012

DIY Red Velvet Cupcakes

Now this is a true story but I never tasted red velvet cupcakes until I baked them one day. I was like 'what's all the fuss?' with this little thing so I decided to try it out. 

Photo from: http://gimmesomeoven.com/red-velvet-cupcakes-with-cream-cheese-frosting/

I used Joy of Baking's recipe. This isn't my picture though but it looks a lot like it! I couldn't take a good picture of it because I'm still not very good at designing. I make really good FUNCTIONAL cakes though. It serves its sweet purpose. 

For cupcakes: 

Makes 12

Group A:
1 1/4 c. or 125 g. cake flour
1/4 tsp. baking powder
1/4 tsp. salt
1 tbsp. Dutch-processed cocoa

Group B: 
1/4 c. or 57 g. unsalted butter (at room temp for 30 minutes)
150 g. White Sugar
1 large egg
1/2 tsp. vanilla

Group C: 
1/2 c. buttermilk
1 tbsp. red food coloring

Group D: 
1/2 tsp. baking soda
1/2 tsp. distilled white vinegar

1. Line muffin tin and preheat oven at 180 degrees Celsius.
2. Sift Group A together and whisk them together. 
3. Cream butter & sugar for 10 minutes (KitchenAid mixer Speed 4). Add egg and vanilla and mix for 30 seconds (KitchenAid mixer Speed 6). 
4. Mix Group C together. 
5. Add Group A and Group C to creamed mixture alternately in three additions, starting and ending with Group A. 
6.  Combine Group D. Let it finish fizzing before folding into batter. 
7. Scoop to the muffin tin evenly and bake for 18-23 minutes until toothpick comes out clean. 
8. Cool in tin for 10 minutes before putting in the cooling rack. 
9. Cool for an hour before putting frosting. 

Ingredient Substitution:

Cake Flour (1 c.)
2 tbsp. corn starch + all purpose flour (to make 1 c.)

Buttermilk (1 c.)
1 tbsp. vinegar + skim milk (to make 1 c.) Let stand for 5 minutes.

Photo from: http://nasilemaklover.blogspot.com/2012/01/red-velvet-cake-cupcakes-with-cream.html

For the cream cheese frosting:

8 oz. chilled cream cheese (cut into pieces in you're using a handmixer)
1/2 tsp. vanilla
1/2 c. or 60 g. powdered sugar
2/3 c. or 160 ml. chilled heavy cream

1. Whisk cream cheese for 10 minutes (KitchenAid Speed 4).
2. Add vanilla and powdered sugar, whisk until well-mixed.
3. Add cream and whisk until thick enough to pipe.

Ingredient substitution


Heavy cream
Use all-purpose cream.

Review:

I just love this recipe! It's simple and it's really good. Although, I just made 11 cupcakes out of it. I should learn how to distribute scoops evenly. 

As for the frosting, it's really good but it's too much for me and my family. We love sugar as much as the next person but we don't really need large swirls of cream cheese frosting. So the next time I'm making this, I'm cutting the recipe in half or I'll make two batches of cupcakes. 

And if you're worried about your waistline, Starbuck's red velvet cake makes 430 calories. Baking can burn 168 to 348 calories according to this site. If you're using a KitchenAid mixer or a  hand-mixer, we can safely assume we burn 168 calories - I mean we will still be cleaning the kitchen up while waiting for the cupcakes to bake. While waiting for the cupcakes to cool, scrub a bathroom and you've already offset the 'caloric damage' of a red velvet cupcake.   

Happy baking!