Thursday, March 22, 2012

Lighten Skin with Lemon & Salt Bath

Last night I was showing my mom the effect of my trial homemade bronzer, which was basically just cocoa powder brushed on my cheeks. I even went under the light so she can see clearly. But instead of noticing my bronzed cheeks, she noticed how clear my skin was. 

Days before she told me as I was under the light that I had eruptions and last night she told me otherwise! I do tea baths almost everyday but yesterday I did something completely different. I bathed in lemon with salt. (We're missing the Tequila here!)

I heated some water, added about 9 Kalamansi (Philippine lemon) and added the salt after turning off the heat. Salt will make it hard for the heater to do its job because of its cooling effects.  

My hair was shiny but it wasn't as soft or manageable as when I did my Stevia, Java Mint and Chamomile bath. But it was very shiny. My skin look like it lightened too. I wear T-shirts a lot and the sunburn just below my collar bone is a mainstay for me. But after doing this, my skin visibly lightened in this area. It is not suggested to do this bath everyday because it might be harmful. But if you want lighter skin and clearer complexion, lemon and salt are your kitchen-go to.

Photo from: http://www.ericcressey.com/sodium-intake-is-salt-bad-for-you

Sunday, March 18, 2012

Java Minty Tea Bath

I had a lot of Java mint spare when my parents harvested for the Fresh Mint Chocolate Chip cookies and the Mint Chocolate ice cream I made for them so I figured why not air dry it and make a tea bath out of it. 


This baby came from my mom's garden. Pretty thing, isn't it? Smells great too. 

Air-drying takes about 3 days. I used about 3 tbsps. worth of dried leaves before putting them in boiling bath water. I left it to boil for another 20 minutes. At around 15th minute, the house was filled with the sweet, refreshing smell of Java mint. My mom noticed it first. I completely forgot about heating the water with tea leaves in it. Ha! This is why I do not cook! But, it was incredible like a whole-house aromatherapy session. But the smell just doesn't stay too long. Too bad. 

The bath was incredible. I currently use mentholated shampoo because when it changes weather a lot, I tend to get dandruff. What I notice about Java mint bath is that it's not as mentholated as what we use in commercial shampoos and body washes. It's a lot milder and the smell doesn't stick so long as all good things but the effects are to be in love with. My hair was really shiny and soft and manageable right after and no itch! I had my mom feel my hair and she said it was like a horse's. And I take that as a compliment. 

After talking about a lot of tea baths here, you might think that all tea baths are made the same. Well, no. I'm just lucky that so far because I've tried good teas that have great effect on hair and body. My mom has tried Lagundi tea bath, although it has warmed her entire body on cold days, it didn't make her hair look as nice. So not all tea baths are made the same but I am starting to believe that all are awesome for skin. I haven't used lotion for weeks (apart from the fact that it's summer)  and I can tell you it's far from being dry. 

Thursday, March 15, 2012

DIY Stevia Tea Bath

So another of the tea bags that I have totally forgotten and just expired are the free samples given to me by an organic Stevia gentleman farmer I met. 

And it would be a waste to throw away like the Expired Organic Chamomile tea bags I had. So I did a little research. According to Wisdom of the Ancients, Stevia can heal cuts and sores. It is said also to smoothen wrinkles and make skin soft when they dry from this tea rinse. A woman also claims that it removes aches and pains when put in the bath and is just as relaxing. It's also a good hair conditioner that helps retain hair color and makes the hair stronger. Just leave the rinse at the bath for 5 minutes. 

With my expired Stevia tea bag, it's time to try this ancient secret to sweetness and beauty.

What you need:


Hot bath water
Stevia tea bags (enough to color water)

Steep tea bags for 15 minutes. Remove the tea bags and enjoy. Tea bags may be reused 5 times.

Review:


It's indeed relaxing but it didn't have the extremely calming effect as the Chamomile bath I had last night. I almost fell asleep through dinner. And it did get  my aches and pains I have or maybe it's the hot water. As for the effect on hair, it didn't turn out as soft as the chamomile bath but the shine of my hair was fantastic and it managed to calm my curls. Definitely a must do! Can't wait to do a chamomile-stevia fusion bath!

This is what it looks like when it's fresh by the way.

Get your Stevia at Php60/seedling. 


DIY Yakult-flavored Yogurt

I was supposed to try out making yogurt but since I forgot to buy yogurt at the grocery store for my starter set and we have Yakult, I decided to make Yakult milk instead.

I wanted a really CREAMY yogurt so I bought my favorite powdered milk, Bear Brand. But creamy Yakult milk, is another thing worth trying.

Since I baked fabulous Fresh Mint Chocolate Chip cookies and making Yakult milk needed oven assistance, I decided to make it after the baking. 

What you're going to need:

1 liter of water
1 pack of 300 g. powdered milk of your choice
1 pc. Yakult

Oven

1. Preheat your oven to 250 degrees Celsius. (Better if you bake first so it's more economical.)
2. Mix the three ingredients together in oven-proof bowl. Put in oven at 250 degrees then turn off the oven. 
3. Leave mixture undisturbed for 12-14 hours. This is what it looks like after 12 hours.


And when you mix it, you will see some formed lumps.


4. Chill for 2 hours and enjoy! Add sugar if you want to taste.


Review:


The consistency reminds me of cottage cheese that's more runny.


It has the tangy taste of yogurt and the aftertaste of Yakult without the sugar. Definitely, an acquired taste. Sugar makes it easier to down just make sure you dissolve the sugar well.  But the health benefits make it totally worth it. For more information on Yakult, visit http://www.yakultusa.com/. Cheers to healthy intestines!

Wednesday, March 14, 2012

DIY Fresh Mint Chocolate Ice Cream

A new twist to an already tested recipe! I've posted before about DIY Ice Cream.  I've always wanted to try mint ice cream and since my parents have java mint (also used on my DIY Fresh Mint Choco Chip cookies), I thought I might as well make ice cream. 

What you will need:

2 all-purpose cream
20 fresh Java mint leaves
1 can condensed milk
1 c. chopped chocolate

So same recipe as DIY ice cream only difference is that we'll be heating the cream in a sauce pan in low fire with 20 leaves of Java mint. Do not boil. Keep stirring the cream until there are bubbles at the side of the pan. Remove from heat and cover pan for 30 minutes. This is what you call steeping. The same thing is done when you make tea. 

After 30 minutes, sift the tea leaves and press it down so all the flavor will go to the cream. Refrigerate cream for about 2 hours or until it looks thick and not runny. Whip it until soft peak. Add chocolate chips to your condensed milk and fold into whipped mint cream. Refrigerate for 6 hours or until it has solidified.

Get your Peppermint at Php60/seedling. 
Visit https://herbalandherbs.wordpress.com/ for more details. 

I got this idea from Simply Recipes and merged it with the easy recipe I got. Turned out well except that again, I dread bittersweet chocolate. (Just a little more and the bittersweet chocolate will all be gone from the pantry. *Evil laugh*)

But it does look good, doesn't it?


What to do with Expired Chamomile Tea Bags

Our next door neighbor gave us a box of organic chamomile tea bags from London about a year ago. But being busy people that we are, we forget things. And two days ago I found out that it already expired.

Photo from: http://www.whittard.co.uk/tea/herbal/organic_camomile_caffeine_free_herbal_25_teabags.htm
Honestly, I found it a waste to just throw it away so I found a different use for it that's just as effective as the oral intake. I used it in my bath. 

I placed in hot bath water 3 bags of this baby. I shampooed and scrubbed with loofa and rinsed out with chamomile tea.  


I knew of the calming properties of chamomile as a drink and as an essence but as a tea bath, who knew? I was so relaxed right after, you'd think I came from the spa. 


I was well-aware that chamomile can be used for highlighting hair for blondes but not of the other benefits of bathing hair with chamomile tea. My hair was so soft and shiny after. Conditioner got nothing on chamomile tea! And it is said to lighten eye bags too. I have yet to try this!

Which reminds me, I have expired stevia tea bags too - but that's another story. Expired tea bags rock!!! 

DIY Fresh Mint Chocolate Chip Cookies (Sugar-free)

A friend of mine has been requesting mint chocolate chip cookies from me for the longest time and it is only now that I found the time to finally try making them. Sure there are available mint food essence available in the market but fresh is always better! And since my parents have an herb garden, I might as well take advantage!

Get your Peppermint at Php60/seedling. 
Visit https://herbalandherbs.wordpress.com/ for more details. 

I got this recipe from Une Gamine dans la Cuisine

Group A:
1 1/2 cups of all-purpose flour
1/2 tsp of salt
1/4 tsp of baking soda

Group B:
1/2 cup or 113 g. unsalted butter, at room temperature
165 g. coconut sugar
1 egg
1 tsp. pure vanilla extract

Group C:
1 cup of semi-sweet chocolate chopped
1/4 cup of chopped fresh mint leaves (or food processed)

1. Sift Group A together. 
2. Cream butter and sugar for 10 minutes (KitchenAid speed 4). Add egg and vanilla then mix for 30 sec. (KitchenAid speed 6). 
3. Add Group A to creamed mixture in 3 additions. Mix only until no traces of flour can be seen. Scrape sides as needed. 
4. Add Group C and fold manually until well incorporated. 
5. Refrigerate for 3 1/2 hours. But you can chill for 30 mins if you cannot wait. (I couldn't wait.)
6. Scoop dough (approx. 1 tbsp./ pc.) in greased cookie sheet. Put flour in scoop as needed so that dough doesn't stick. Place cookie dough one inch apart each other in cookie sheet.  
7. Bake at preheated oven temperature 180 degrees Celsius for 7 minutes. Leave in cookie sheet for 10 minutes before transferring to cooling rack. 

Makes 20. 

Recipe Review:

I think I've mentioned in my  post for DIY ice cream that I'm not a big fan of chocolate cake or ice cream. It's the same with cookies but it's always nice to bake for your mom who worships chocolates, yes? 

What I don't like about my first attempt is the fact that I used bittersweet chocolate. It was the only thing available in the pantry. I'm weak against bitter stuff because I'm sweet. Ha ha! My mom loved it though. She's a sucker for all things bitter. Eew. 

I like how the cookie is firm on the sides and chewy and wonderfully moist on the inside. The green patches are not as visible when you see the cookies in person. I used flash for this photo. 


I guess the only down side to using fresh mint leaves in your cookies is that it tends to get stuck between your teeth. But if minty fresh breath after a sweet treat is what you are after, this cookie will not disappoint. Will definitely make them again but this time with semi-sweet chocolate.

Get your Peppermint at Php60/seedling. 
Visit https://herbalandherbs.wordpress.com/ for more details. 

Tuesday, March 13, 2012

DIY Sexy Thighs

After posting about two wonderful cakes and thinking about making mint chocolate ice cream and caramel frosting, I think it's about time I thought of posting something about fitness. And what better way to offset these wonderful craving than working on our booties. 

I've obsessed about my thighs and have done self-cellulite massage and have discovered in my first blood donation that it can be thigh-slimming. I wish I was kidding too but my pants were really loose on the thigh area after my blood donation. But mind you, it's not the be and all of slimming down your already wonderful pair of thighs. 

I've began exercising regularly starting January 3 and I have since focused on my thigh size reduction. I measured myself before beginning with my exercise and by the first week of March (blood donation not included), I've already lost 1 inch not only on my thighs but also my arms and waist. And I'm going to share some of the things, I've done after days of searching the internet for the best way to lose all the unwanted gravity on my body. 

Since I have very low attention span, I only do these for 30 minutes. 

1. Walking 
2. Brisk walking and jogging 
3. Biking
4. Home Exercises - include warm-up exercises and other movements that target the thighs. 

Home Exercises


Apart from 100 counts of skipping rope, squatting to going all the way down, jumping jacks, stair step exercise, butt squeezes, weights, sit-ups and elbow-knee reach crossovers, what I really want to share here is an exercise I discovered upon my search. It's deadly but it's very effective! It gets easy to do once you get used to it. I showed this to my best friend and she told me she had results in just two weeks along with the cellulite massage. I can really say the same. My thighs were definitely firmer after two weeks!

I like the sumo squat jumps better, which is like the reverse of a jumping jack. The curtsy lunge and side lunge done alternately is a little too deadly for me. What I like to do is do curtsy lunges and side lunges separately with 15 counts for each side and 3 repetitions. 
I guess the most effective way to get your sexy thighs is to be consistent and to exercise regularly. Mix and match exercises so that you don't overdo anything and you give your muscles time to rest. 
To keep me really motivated to exercise and to create the exercising habit, I have put up an exercise calendar. 
Photo from: http://stuff.icanhascheezburger.com/2010/06/08/cute-kawaii-stuff-june-calendar-wallpaper/cute-june-calendar-2/
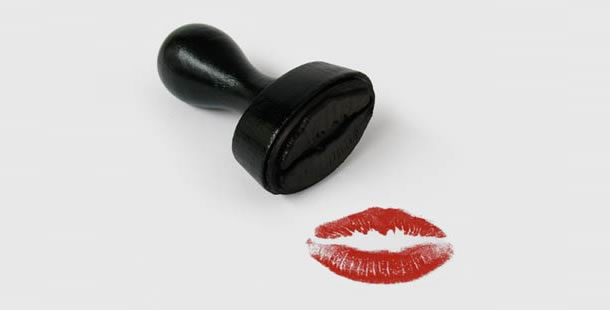
Mine has pictures of cute kittens but this is just so cute and perfect for me (cupcakes)! Every time I exercise, I stamp the date with a kiss mark. 
Photo from: http://heartrouge.blogspot.com/2011/02/lip-stamp-muah-muah.html
Every time, I miss a day, I pay the next day. Meaning if I don't get to exercise for 30 minutes on one day, I exercise for one whole hour the next day. I've also placed below my calendar, the handwritten word DISCIPLINE to remind me to be disciplined about it. And it's a good reminder because I pass by it almost all the time. I still allot a day's rest from exercise. But now, when I don't do to my regular exercise patterns my body starts looking for it.  Remember, YOU are the boss of your body! Don't let it tell you what it wants to do especially when it's lazy. 
I used to want to be really slim like those Korean pop stars and weigh 50 kgs.even if its underweight for my height but a few months of exercise made me appreciate my own body. I realized that it's not the weight but the health to do the things I like doing, the glow of my skin, the shine of my hair, the clarity of my thoughts and the ability to donate blood that is more important to me. Now I'm happy with myself but it doesn't mean I'll stop taking care of it. In fact, it motivates me to look better by taking care of myself. Yes, exercise does that.  
As Laura Pirott says in her Elf-help book, Take Charge of Your Eating...
Photo from: http://www.indiebound.org/book/9780870293788
Look at your body and appreciate your physical uniqueness. Relax and be as you are, without trying to hide or wish away parts of yourself. God has lovingly made you. Marvel at the creation that you are. 

DIY Yellow Cake with Cookies 'n Cream Frosting

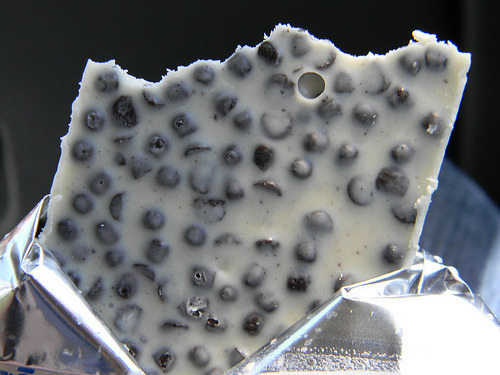
I've been a sucker for cookies 'n cream. When I was about 9 or 10, my dad came home with a lot of Hersheys cookies 'n cream chocolates. I devoured a bag on a one-way day trip. It's just really weird because I'm a big fan of white chocolate but not of Oreos. 
Photo from: http://-foodporn.tumblr.com/post/22577889546
I'm still no fan of oreo, but cookies 'n cream? Count me in, most definitely! 

I'm also a HUGE fan of yellow cake so I married these two favorites in one, which was an amazing experience like falling in love for the first time. 

I used Smitten Kitchen's yellow cake recipe which was intended for caramel cake but I haven't perfected caramel yet. Wait and see, caramel, I shall get you right soon! 

For the yellow cake

Group A:
2 c. cake flour
1 tsp. baking powder
3.4 tsp. baking soda
1/2 tsp. salt

Group B:
1/2 c. or 100 g. butter (at room temperature for 30 mins.)
3/4 c. or 160 g. white sugar
2 large ORGANIC eggs
1 tsp. vanilla

1 c. buttermilk

1. Preheat oven to 180 degrees Celsius. Grease an 8-inch square pan, put parchment paper and grease paper. I like using my 9-inch round pan for this recipe instead.
2. Sift together Group A.
3. Cream butter and sugar for 10 minutes (KitchenAid mixer speed 4). Add one egg at a time and mix (KitchenAid mixer speed) for 30 seconds. Add vanilla with last egg and mix. 
4. Add all the buttermilk and mix. 
5. Add in Group A to mixture in 3 additions. 
6. Put in pan and rack pan to rid of air bubbles. 
7. Bake for 35-40 minutes or until the toothpick comes clean.
8. Cool in pan for 10 minutes before transferring to rack. 
9. Cool for an hour before frosting. 

Important: 

I studied baking before and never in my life was the liquid (buttermilk in this instance) added first before the dry ingredients (flour, baking soda, baking powder, salt). But it totally works with this recipe so don't deviate, otherwise there will be a lot of holes in the cake. Trust me, I know. I've tried. 

Organic eggs: 

You have the option of using ordinary eggs but I tell you organic eggs make a lot of difference. I'm sure some of you know that yellow cake gets their color from the yellow of the egg. Let me tell you ordinary egg yolks pale in comparison with organic egg yolks. Not only is the color better, the cake is so much fluffier also! I haven't tried organic eggs with chiffon cakes but I can only imagine how wonderful it would be! I can't wait!

Photo from: http://en.wikipedia.org/wiki/Yellowcake

Not my picture. Ha! I really have to take pictures of the goodies I bake before they're gone. 

For the frosting, I used Bake Space's wonderful cookies and cream frosting. 

1/2 c. or 100 g. unsalted butter
1 3/4 c. or 190 g.  powdered sugar
pinch of salt
1/3 c. or 80 g. whipping cream
1/2 tsp. vanilla
crushed oreos

1. Cream butter and powdered sugar and salt. 
2. Add whipping cream and vanilla. 
3. Fold oreos. 

Crushing oreos: I use my food processor to make oreos into a powder. I not only put it in the frosting, I'd like to top the cake too with it. So yum! 

Craving!!!

Below are some ingredient substitutes you can make:

For the cake:

Cake Flour (1 cup)
2 tbsp. corn starch + all purpose flour to make 1 cup

Buttermilk (1 cup)
1 tbsp. vinegar + skim milk

For the frosting:

Whipping cream
Use all-purpose cream

Computing calories:

Yellow cake (accdg. to Calorie-charts) = 245.28/slice
Cookies 'n cream frosting (accdg. to Food) = 235.2/slice
Total = 481 calories/slice of this delish recipe

At this point, I really don't care about the calories, I mean if you've tasted it, you'll know it's worth it! But in case you are trying to lose some weight, here are activities you can do to rid of yourself the guilt trip. And as I've mentioned in my red velvet cupcake post, you can burn 168 calories just by baking (and cleaning up. It's really part of it.) 

So get up bake and enjoy!

Monday, March 12, 2012

DIY Red Velvet Cupcakes

Now this is a true story but I never tasted red velvet cupcakes until I baked them one day. I was like 'what's all the fuss?' with this little thing so I decided to try it out. 

Photo from: http://gimmesomeoven.com/red-velvet-cupcakes-with-cream-cheese-frosting/

I used Joy of Baking's recipe. This isn't my picture though but it looks a lot like it! I couldn't take a good picture of it because I'm still not very good at designing. I make really good FUNCTIONAL cakes though. It serves its sweet purpose. 

For cupcakes: 

Makes 12

Group A:
1 1/4 c. or 125 g. cake flour
1/4 tsp. baking powder
1/4 tsp. salt
1 tbsp. Dutch-processed cocoa

Group B: 
1/4 c. or 57 g. unsalted butter (at room temp for 30 minutes)
150 g. White Sugar
1 large egg
1/2 tsp. vanilla

Group C: 
1/2 c. buttermilk
1 tbsp. red food coloring

Group D: 
1/2 tsp. baking soda
1/2 tsp. distilled white vinegar

1. Line muffin tin and preheat oven at 180 degrees Celsius.
2. Sift Group A together and whisk them together. 
3. Cream butter & sugar for 10 minutes (KitchenAid mixer Speed 4). Add egg and vanilla and mix for 30 seconds (KitchenAid mixer Speed 6). 
4. Mix Group C together. 
5. Add Group A and Group C to creamed mixture alternately in three additions, starting and ending with Group A. 
6.  Combine Group D. Let it finish fizzing before folding into batter. 
7. Scoop to the muffin tin evenly and bake for 18-23 minutes until toothpick comes out clean. 
8. Cool in tin for 10 minutes before putting in the cooling rack. 
9. Cool for an hour before putting frosting. 

Ingredient Substitution:

Cake Flour (1 c.)
2 tbsp. corn starch + all purpose flour (to make 1 c.)

Buttermilk (1 c.)
1 tbsp. vinegar + skim milk (to make 1 c.) Let stand for 5 minutes.

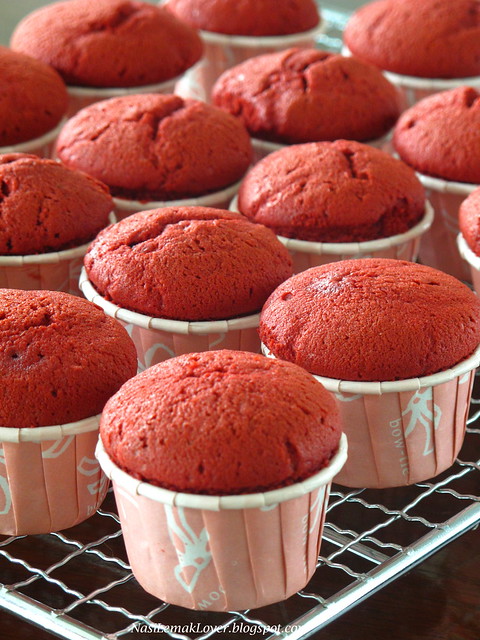
Photo from: http://nasilemaklover.blogspot.com/2012/01/red-velvet-cake-cupcakes-with-cream.html

For the cream cheese frosting:

8 oz. chilled cream cheese (cut into pieces in you're using a handmixer)
1/2 tsp. vanilla
1/2 c. or 60 g. powdered sugar
2/3 c. or 160 ml. chilled heavy cream

1. Whisk cream cheese for 10 minutes (KitchenAid Speed 4).
2. Add vanilla and powdered sugar, whisk until well-mixed.
3. Add cream and whisk until thick enough to pipe.

Ingredient substitution


Heavy cream
Use all-purpose cream.

Review:

I just love this recipe! It's simple and it's really good. Although, I just made 11 cupcakes out of it. I should learn how to distribute scoops evenly. 

As for the frosting, it's really good but it's too much for me and my family. We love sugar as much as the next person but we don't really need large swirls of cream cheese frosting. So the next time I'm making this, I'm cutting the recipe in half or I'll make two batches of cupcakes. 

And if you're worried about your waistline, Starbuck's red velvet cake makes 430 calories. Baking can burn 168 to 348 calories according to this site. If you're using a KitchenAid mixer or a  hand-mixer, we can safely assume we burn 168 calories - I mean we will still be cleaning the kitchen up while waiting for the cupcakes to bake. While waiting for the cupcakes to cool, scrub a bathroom and you've already offset the 'caloric damage' of a red velvet cupcake.   

Happy baking!