Sunday, October 28, 2012

Write Your Book, Publish It, And Sell It Too!

Image from: timemanagementninja.com


I had the most exciting discovery as I watched Shop Talk on ANC August this year. Ms. Mina Esguerra of Bronze Age Media, Inc. talked about Online Indie (Independent) Publishing! Watch it here!

People who really know me, the very few of them, know that I love writing stories. As much as I love planning for the businesses I try to break into, in between the pages of the notebooks and the journals where I compute costs and jot down product and marketing ideas, are story plots and sequences, dialogues of still unnamed characters and quotes that I will insert in a story I will write somewhere in time. I wish I could help it but I can’t. I’ve been at it ever since I was a six. I guess the only difference is during that time, I wrote it behind my history and geography notebooks. Don’t tell my teachers.

I’ve posted a lot of my poetry, short stories, and fan fiction under a pseudonym. I’ve gotten my share of constructive criticism and flames (non-constructive ones). But the moment I moved into writing my own fiction, of creating my own characters, of making their story, of pencil pushing for days, weeks and months finding that elusive yet perfect writing style for the story I was writing, I found more courage to go to the next level. And the dream is to someday be published, for my writing to be immortalized in some way.

“If you find yourself asking yourself (and your friends), "Am I really a writer? Am I really an artist?" chances are you are. The counterfeit innovator is wildly self-confident. The real one is scared to death.” ― Steven PressfieldThe War of Art: Break Through the Blocks & Win Your Inner Creative Battles


But there is a big fear standing in the way of anyone wanting to be published or wanting to be successful for that matter. We’ve read it in many success stories and it’s called rejection. The world says that everything is business that it’s nothing personal. But for the people who placed their hearts and souls to creating something they are finally brave enough to show the world (albeit, after keeping it hidden hundreds of times), it’s not business, though it comes later, at the beginning it’s purely personal.

So wouldn’t it be great if we can write our stories, publish it and offer it to potential readers ourselves? That’s what Bronze Age Media, Inc. had to offer when they held their Author At Once workshop last Saturday, October 27 at the Cafeccino by the Dome in Eastwood Mall. They gave us a rundown of what to expect when you are looking into publishing your own work online, from writing a good manuscript to finding editors, beta-readers, book cover artists and printers even as far commissions and in-depth statistics of how you can check how well you are doing online as far as your book is concerned. They definitely didn’t hold back on any information because they believe all good things deserve to be shared!

As for me, I am hyped up about the idea of publishing my own book and having an administrative control over it. It is easy to do, much like posting your story online in any website! Of course, more diligence is needed like finding a good team to work with you because you definitely cannot do this on your own. After all once you are published, you are no longer posting it for free reading that’s why you have to make sure that the entire package is worth your potential reader’s time and money.

Being a writer is truly a humbling experience. It takes a lot of courage and humility to be one. I hope other writers are inspired by the efforts Bronze Age Media is making through sharing what they know. After all, there is no beauty in art, in whatever form, unless it is shared with people who can appreciate it. People constantly look for art that speaks to them. There is a way to be found. Make sure you are found.

For more information about Bronze Age Media, Inc.’s Author At Once Workshop and other services, visit them at www.bronzeage.ph. Follow them on Facebook and Twitter as well!

Happy writing!   

How to Make Your Feet Happy: DIY Minty Foot Soak

Image from: pregnancy.healthguru.com


Our feet are the most neglected part of our bodies. We subject it to horror stories like breaking in new shoes (how often are those shoe sales?), brisk walking or running or standing for hours in heels, keeping it in closed shoes, and sometimes, washing it before it’s given enough time to rest. Yes, our feet needs a break from the daily stress of we subject it to. And you can be grateful to it naturally, organically in the comfort of your own home.

What you will need:

About 2 tbsp. Mint leaves (any kind)
½ c. Organic Sea Salt
Basin
Hot Water
Additional water to temper the water

What to do:

  1. Place hot water in basin and add the mint leaves. Make sure you wash the leaves prior to adding it to the basin. Just wash it with water. Leave the leaves to steep for about 10 minutes.
  2. Add the salt.
  3. Test the water’s warmth. Make sure it’s bearable for your feet. You may add as much water as you’d like to temper it but keep it warm.
  4. Watch TV and enjoy this soak for 15 minutes. Dry feet with towel.

It was truly a treat for my very tired feet as it was detoxifying because of the salt. It left a mild minty smell on my feet and a mild coolness to it too. It goes without saying that I was so relaxed and I slept so well that night. I used Java mint leaves.

Get your Peppermint at Php60/seedling. 
Visit https://herbalandherbs.wordpress.com/ for more details. 

Now you can be grateful to your feet, home spa style at a fraction of the cost and a surplus of love. 

You can also opt to do a sugar scrub (for directions, click here) for an instant hand and foot scrub. Your hands and feet deserve it and you don’t have to go to the salon for it! 

No mint plants at home? 
Visit us at https://herbalandherbs.wordpress.com/ for organic culinary and medicinal herbs.

Wednesday, October 3, 2012

Japanese Mint Facial Steam & Salt Scrub

I've been meaning to have a steam bath. The last time I did it, I placed Eucalyptus essential oil from Body Shop. And boy, was that steam bath intense! My face sweated profusely and because I accidentally dropped too much Eucalyptus oil (Please don't make the same mistake), it was a little too hard on my nostrils. 

So this time I was a little determined to make it more enjoyable. I asked my mom for some mint leaves and she introduced me to one of her new toys. Meet Japanese Mint. The leaves pretty much look the same as the other mint family but the taste is definitely milder. I used mint for this facial steam because according to some websites it's good for acne and perfect for oily skin. 


So you'll be needing 2 tablespoons of leaves. Just eyeball it. To me, it's this much. Wash it with water. 


Boil about a cup of water in a sauce pan. Turn off fire, and add leaves. Steep for 10 minutes. 


This is how it will look like. 


Put sauce pan in a table. Put a towel over your head above the sauce pan. You'll be chilling out for 8-10 minutes (for oily skin) or 3 minutes (dry skin). 

After the facial steam, your pores are open. It's the perfect time to exfoliate! I use salt-coconut oil scrub to match the detoxifying effects of facial steam. Just eye ball the mixture or use 1/2 tsp. and enough coconut oil to cover the salt. Here's what mine looks like. 


Facial steams have plenty of benefits. It improves blood circulation that leaves a rosy glow, helps exfoliation and it's detoxifying. It also helps in nasal congestion and headaches caused by colds. But be wary that not everyone can benefit from facial steams. Check out the article Benefits of Face Steaming for more information. 

Get your Peppermint at Php60/seedling. 
Visit https://herbalandherbs.wordpress.com/ for more details. 

As for me, I enjoyed doing my own facial steam. It was mild unlike my first attempt. The salt scrub is also wonderful. I kind of wish I had organic sea salt though. It left my skin is smooth and soft after and moisturized because of the coconut oil too so it's like exfoliation and moisturizing in one. I'm certainly doing this again! I can't wait to do my own makeshift sauna/body steam next!

Monday, October 1, 2012

My First Try At Making Tablea Leche Flan!

My mom reminded me last night that I have to use the evaporated milk in our food cabinet because it's been there for quite some time and it might end up expired again (like the many others before it). So as a dutiful daughter, I decided to try making Tablea Leche Flan. Find the recipe below.

Get your Pure Batangas Tablea at Php40/50 g. 
Visit https://herbalandherbs.wordpress.com/ for more details.

Ingredients: 

For the Custard:
1 can evaporated milk
3/4 c. sugar
60 g. pure Tablea
3 large organic eggs at room temperature
A pinch pinch salt

For the syrup:

3/4 c. sugar
3/4 c. water

Instructions: 

1. For the first part, check out the instructions HERE. It's the same thing as making chocolate ala Dulcinea! Allow the mixture to cool. I left it for 30 minutes.


2. While waiting for the mixture to cool, make the syrup. Melt sugar at low heat, keep stirring so you won't burn it. When completely melted and of golden color, add the water. Continue heating until the sugar is dissolved. Do the spoon test. (I don't know if I heard it somewhere or if I just invented a name for it.)

Spoon test: Dip the spoon in the syrup and put it at eye-level. If it forms a thread suspended in mid-air like the picture below, it means it's ready!


Transfer it to the Leche Flan molds.


3. Prepare the steamer. 

4. Mix the remaining evaporated milk into the Tablea-milk-sugar mixture. Add one egg at a time, mixing in well between. Add a pinch of salt and mix mix mix some more. Don't use a whisk. Use a spoon. I have a friend whose aunt has a leche flan business. They say the trick to the melt-in-your-mouth goodness is not creating bubbles in the mixture. When it's already well-mixed, stop yourself from mixing further. Put the mixture in the molds. Then cover it with foil. 


5. When the steamer is ready, put the molds and steam for 45 minutes. 

6. After steaming, remove the from steamer. Remove foil to cool. Cool for about 30 minutes before refrigerating. Refrigerate before tasting. 


A picture of delicious...


It's really a WOW, I tell you. Usually, I am my worst critic but at the taste of this one... I was speechless. It's exactly what I want in sweets. It's sweet enough but it doesn't have that overbearing sweet after taste. It's decadent. Not bad for a first try. I kind of hope though that I had enough coconut sugar to make this so it'd be sugar-free. There's surely a next time!

Get your Pure Batangas Tablea at Php40/50 g. 
Visit https://herbalandherbs.wordpress.com/ for more details.


Recreating the 'Churros con Chocolate' Syrup

It came as a huge surprise to me as I was in the process of making Tablea Leche Flan when the consistency of what I was making was like the Dulcinea's chocolate in 'Churros con Chocolate'! Now if you are my Twitter friend, you'll know that it's one of my absolute favorites! I post weekly about my craving for it (even after eating it). Sometimes, I lie awake at night thinking of it along with my friend's special Takoyaki and Blueberry Cheescake cookies. But you didn't have to know that.


Get your Pure Batangas Tablea at Php40/50 g. 
Visit https://herbalandherbs.wordpress.com/ for more details.

As for the recipe, here it is:

2/3 c. evaporated milk
3/4 c. sugar
60 g. pure Tablea

Instructions: 

1. Put them in a sauce pan at low heat.


2. Keep stirring. Every time the mixtures gets too frothy, turn the stove off for awhile. Let the froth subside then turn the stove on again at low heat and keep stirring. Stir until there are no Tablea lumps and you achieve the consistency (3rd picture).


3. Transfer in a bowl to cool. As it gets cooler, it thickens.


Serve warm and enjoy!

Get your Pure Batangas Tablea at Php40/50 g. 
Visit https://herbalandherbs.wordpress.com/ for more details.

I really wanted to make it totally organically sugar-free through the use of coconut sugar but I ran out. I'd go 100% coconut sugar for this though. Now... if I can recreate the Churros too. 

I highly suggest that you use pure cocoa Tablea. Most of the things we find in the supermarket already have milk, flour, and sugar in it. If you use pure cocoa, you can control the sugar you put into it and make it a little less sinful and waistline-friendly.

Wednesday, September 12, 2012

A Good Reason to Put Down the Junk Food

Image from: www.epicurious.com


I have been aware for some time that Yellow No. 5 is cancerous. And though aware, I have been weak against the calls of craving of my favorite not-so-healthy food.

Snacks

When I go to the supermarket, I get like 3 BIG bags of junk food. But with family members left and right suffering from cancer, I am going to fight the urge and resist! Check the label of your favorite snack! You'll be surprised that you will find it, everywhere!

Instant Noodles

I love instant noodles especially when it's cold and raining. But apart from the noodles being almost made of wax, it also has *drum roll* Yellow No.5. So even if it is has special healthy ingredients in it, I will try to resist the urge to buy some of these.

Beverage

I'm a water-drinker so I'm not really a fan of other beverages unless it's fresh juices but do check your beverage for Yellow No. 5. Side note: Did you know that ice has a use in your cola? Colas use Asparteme. Asparteme turns into fire ant poison when the temperature goes higher than 30 Celsius. That's the purpose of ice. 

Candies

I believe candies have them too. So check the labels!!! Thank goodness, we still have chocolate. I better get started on making my own version of sugar-free chocolate soon. 
Here are the other cancer-causing food coloring that we have to watch out for from Cancer Causing Chemicals - We Use It Everyday. Check your cosmetics too! They put them in there too!

Confirmed Cancer Causing:
  • D&C Red No. 33 also (CI 17200)
  • FD&C Blue No.1 also (CI 42090)
  • FD&C Yellow No. 5 also (CI 19140)
  • FD&C Yellow No.6 also (CI 15985)
Dear Food Producers, please be more considerate. You have families too. I'm sure you want to take care of them. What will happen if they eat this stuff you've created? I've never been so motivated to go back and infuse organic ingredients in my baking!

Check Your Body Oil

Image from: www.labelproductions.com


I came across this article as I was looking for evidence that Dimethicone is cancerous, Cancer Causing Chemicals - We Use It Everyday.

In the list, states:

Mineral Oil: Also called liquid parrafinum, mineral oil is a byproduct of petroleum that coats the skin like plastic. It disrupts the skin’s natural ability to purge itself of toxins, slows down cell function and can cause premature aging. Mineral oil can also be found in paraffin wax, paraffin oil and petrolatum.

I was in shock, of course! Mineral oil is the basic ingredient of body oil! And we wonder why a lot of people have cancer! We have been developing it since birth! Parents, please research on what you put on your babies' bodies. I'm definitely shifting to Virgin Coconut Oil. I hope you are too!

Tuesday, September 11, 2012

Breast Cancer and Your Deodorant

A friend posted this on Facebook.


Just recently, my father's sister-in-law died of breast cancer. Her cancer cells were mostly under her underarm. When I read this, I felt as if this is what really caused her breast cancer. 

It's very sad that a fellow human being would produce products that could be harmful to another human being. I mean, what for? Just money? It may not be bloody but isn't it slow murder? 

Anyway, this pushed me to check my deodorant for any paraben. Luckily, it doesn't have it. I checked my lotions and moisturizer and found (guess what) Methylparaben. You might say, hey it's just topical application. But do your own research because mine came out with "Methylparaben is quickly absorbed through the skin". I am so fixing my lotion recipe after this. (I read you can make your own tinted moisturizer with a DIY lotion. Psyched!) 

Resolution: Though it is, at the moment, still impossible to go a day without carcinogenic ingredients whether in our beauty regimen or diets, awareness can help us make informed choices. We owe ourselves to take care of our bodies. And this is not a petty matter at all, because our bodies act out what our minds can conceive. Our bodies will always be the most advanced technology and it is only righteous to care for it. 

Ginger Tea for Your Bath

Weeks ago, we were practicing for my choir's first concert EVER! With little time to prepare, we practice for hours almost three times a week and with the current weather that's more bipolar than I am when I am on my period, our instruments were in it for some throat setbacks. And our go to? Why Ginger Tea (More popularly known as Salabat here)! And of course, it helped with it's soothing, spicy hot number.

Everything I intake, I research over the Internet for some confirmation. And in my surfing, I found out that Ginger Tea has a lot of skin benefits when you put it in your bath like detoxification, soothes aches and pains, for colds & fever, good blood circulation! And yes it helps soothe menstrual cramps too! I've also read somewhere (I don't remember where, Sorry!) that it's good for dandruff, Psoriasis and removing scars (oooh.)

And of course, being the tea bath girl that I am (try other tea baths like Java Mint, Stevia & Chamomile too),  I decided to try it out. I didn't use any oils. Just good old ginger chopped up. 


What you will need:

A bucket of water
Chopped Ginger
Heater

Instructions:

Place chopped ginger in bucket of water and heat for 20 minutes (The same goes with Ginger tea for oral intake. You can keep reusing while the flavor is still there. It gets spicier every boil.) Add water for the bath and bathe like the usual.

My verdict:

I was suffering from allergies when I tried this. (I got this allergies from trying old perfumes if they have expired. I should charge myself hazard pay. Perfumes are only good for two years. Longer than that and I assure you, you will get bad allergies like mine. I better find a good way for to use these perfumes.) 

It was a concern for me if this would help my allergy condition. I have taken an anti-allergy pill to help me get drowsy and ignore the itch because it's unbearable and unsightly. I rubbed some ginger on my face and body too while in the bath. I don't know if it's the medicine or the ginger but my itch patches are subsiding very quickly. Apart from feeling relaxed, I notice that my skin feels powdery soft after I have towel-dried. Even, my menstrual discomfort is lessened. 

With all these benefits, this is definitely a must do! And if it works so well with my skin, I bet it can do wonders in my scalp. And that's just the tea bath!

Concert

As for our concert, this are the videos if you want to hear them. 

Great Are Your Works

Humayo't Ihayag

I did the solo for 'Great Are Your Works' so I am a living testament that Ginger does work. Goes to show that Ginger is not only voice care material, it's skin care and hair care material too! To the next concert and next ginger bath! 

Molasses Hair Conditioner for the Brunettes

Image from: www.huffingtonpost.com


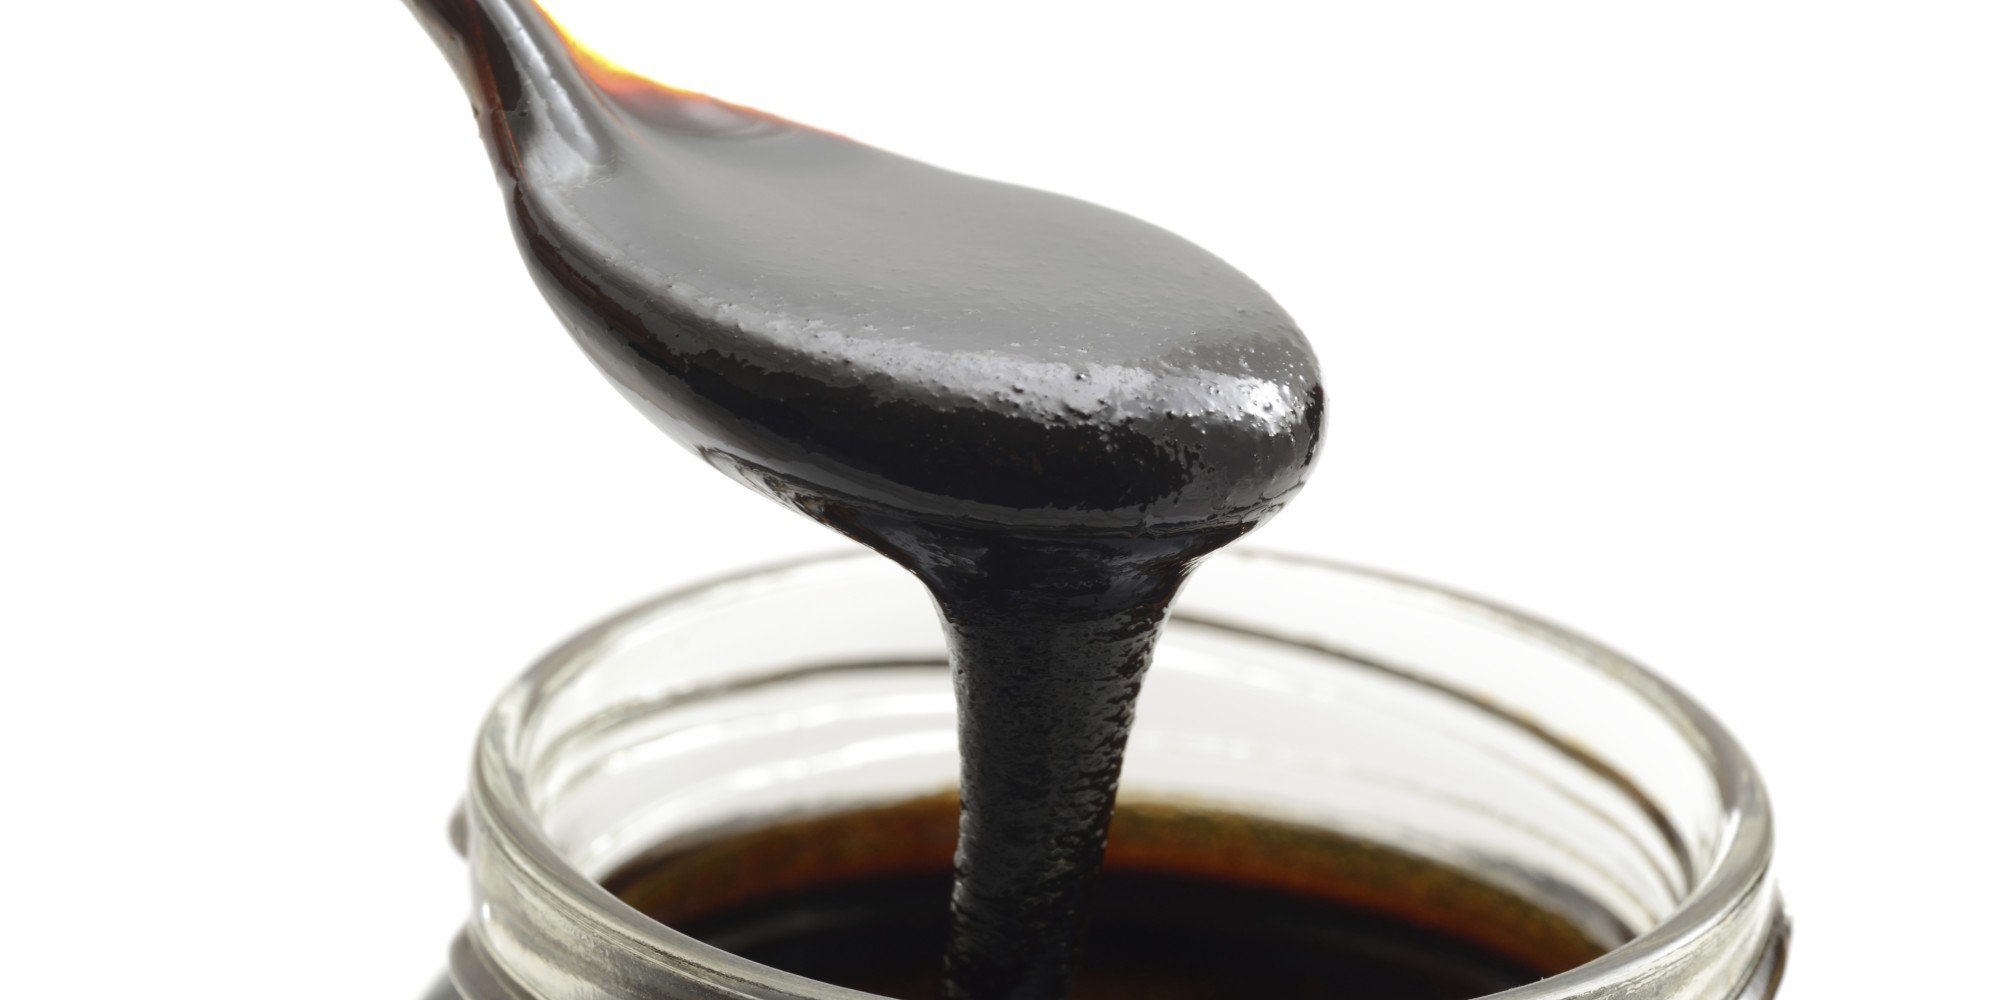
I love Molasses. When my bakery was still up, I used molasses instead of glucose. It made and kept my cookies, crinkles, and brownies soft and chewy and it didn't over-sweeten it. Plus, it's not overly processed so it's much healthier. Thus, I love it. I love it to the very core of my being. 

I've been trying to develop my own cold wax for hair removal that didn't need heating and I just know that Molasses is party to this recipe. So I was researching like crazy when I found out that Molasses can be a good hair conditioner. So armed with Molasses, I rushed to my bathroom and gave it a go. 

I just shampooed as usual. (For people, who have oily scalps like me, it is suggested you shampoo twice. You can even do a baking soda rinse, check it out HERE. It's just as good as using shampoo.) And I used Molasses as my conditioner. Instructions in other websites say that you can leave it on for 20 minutes or use it as conditioner (you can add water if it's too thick but keep it paste-y). Personally, I prefer using hair masks as conditioner because my hair has this tendency to get too damp. Damp as in it won't dry even after days! Plus, it's a time-saver. 

I enjoyed my first-time with Molasses. It didn't leave my hair damp like other hair masks. And it also kept my hair down. I have coarse, wavy, thick hair. Need I say more? It is also said to strengthen hair and leave it with great luster and dark, rich color so it goes without saying, the blondes and redheads can't do this without compromising hair color.

As for me, I'm getting myself a pump bottle for my new, natural conditioner. Try it yourself!