Showing posts with label skin care. Show all posts

Monday, April 6, 2015

An Eggziting Way to Remove Blackheads

It is an enigma to me too why it took me this long to post about this, especially when I practically do this every two weeks (sometimes weekly if my blackheads are going Spartan army on me.)

I once removed my blackheads using Nu Skin. (You can check the post here.) But I have long abandoned it because I opted for a more natural, if not more organic, facial care. But it’s really mostly because it’s the cheaper option (let’s be honest). It’s just as effective without the cancer-causing agents in tow. So, why not right?

So how does one remove blackheads without store-bought face masks (which don’t work on me) and without going to facial centers that uproot blackheads through pricking and squeezing? Ouch!

Well, it is closer to you than you think.

Image from: www.rsc.org


You will need the following:
An egg
A sheet of toilet paper
Scissors
Soap
Ice cubes

Directions:

1. Separate the yolk and the egg white, and then get about a teaspoon of egg white. (This depends on the size of your face. I have a lot of leftovers when I use 1 teaspoon.)
2. Next, fold a sheet of toilet paper in half so that it forms a triangle. Cut it in the middle. One ply of this paper triangle will serve as your nose strip.
3. Wash your face with gentle soap and pat dry.
4. Apply the teaspoon of egg white on your face and your neck using your beauty fingers. Making sure you only apply it upwards to avoid wrinkles.
5. Slowly dab your makeshift nose strip using your fingers. You need to be very gentle when you do this because you might destroy the toilet paper.
6. After applying the nose strip, apply a second coating of egg white on your nose.
7. Let it dry. This will take about 30 minutes. Try not to move around so much or else the mask will crack. If air enters the mask, it might itch.
8. When it’s all dried out, slowly pull your nose strip. I pull one side at a time
9. You can repeat this again if you have more blackheads left (also known as Spartan mode), but just limit it to thrice in a row. If you are satisfied the first time, you can wash your face and apply the ice cubes on your face. This will close your pores and prevent dirt from coming in, at least temporarily.

Put the leftover egg white where you dipped your fingers in your plants. It makes a good fertilizer.

As for the remaining egg white, you can store it. It usually keeps for a few days in an airtight container. I personally prefer to cook it with the initially separated yolk, and crack open a fresh every time I extract my blackheads.

If you want to use free range eggs, that’s so much better! Free range eggs do not have hormones in it.

Let me know if this works for you!

Wednesday, April 17, 2013

Use Beauty Fingers On Your Face

No, they are not the prettiest fingers in your hands. But these fingers are supposed to be the only fingers you use when you cleanse, tone and moisturize your face. 

If you're washing your face with your hands like what they do in commercials (using all your fingers), well, you are doing something wrong. The best fingers to touch it with are your middle and ring finger. Why? Because they don't exert as much force as the thumb and the pointing finger and definitely, gentler than your palms. 

I remember Rachel Ray featured in one of her episodes before about how one person sleeping on one cheek can deform the face as we age. The concept is the same when we apply to much force when we wash, towel dry, tone and moisturize our face. 

It will take a lot to get used to but let's be gentle to our faces. After all, our faces are our fortune. Remember, use your beauty fingers as seen below!

Image from: www.popsugar.com

Milk Sponge Bath

Image from: www.bbcgoodfood.com


We all know the benefits of milk in our skin. Applied every other day, milk makes a very mild exfoliant that you wouldn't mind slipping onto your lips. And I believe that if it's good for your face, it's bound to be great for the body.

I know what you are thinking,  a bath tub filled with chilled milk is indeed heaven but not very practical. But this doesn't mean that you cannot enjoy this luxurious treat ala Cleopatra. You can. And I might add, at a fraction of the cost.

What you will need:

Milk (Preferably chilled) - Amount will depend on you
Face Towel - Make sure it's soft!
Dipper/Bowl

Optional:

You can also add any or all of these into the milk. I added everything last time. So good!

Lemon (Lightening of skin & scars) - If you are going to add lemon, let is sit in milk for 10 minutes

Honey (Moisturizer)

Egg white (Skin lift) - Don't discard egg yolk. Mix it with the shampoo you will use for an easy protein treatment.

What to do:

1. Put milk (and other ingredients) in bowl. (Note: If you're going to use lemon, let it sit together for 10 minutes first).  
2. Let face towel absorb milk.
3. Gently apply over skin repeatedly in the shower. (Make sure you are dry when you do this.)
4. Stay marinated in milk for awhile.
5. Rinse with water, towel dry and notice the difference!

My verdict:

For me, this is the best way to express 'I love me' yet! Well, at least from the comfort of your own home.

Friday, February 1, 2013

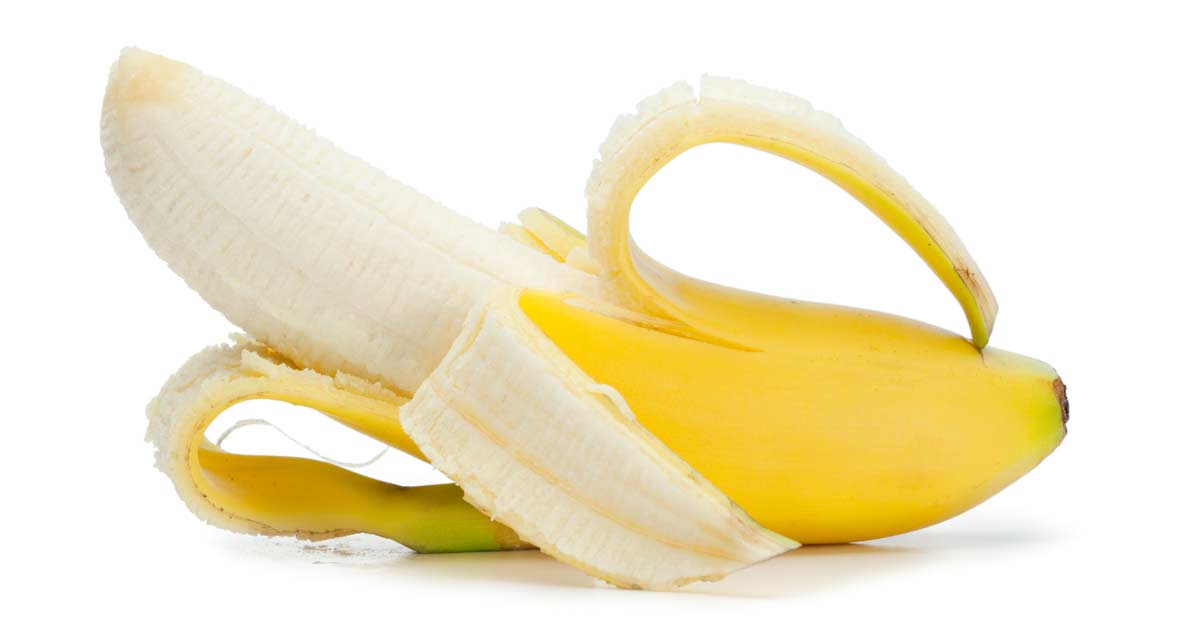
Tighten Pores With Banana Peel!

Image from: foodfacts.mercola.com


Apparently, banana peels aren't just for slapstick comedies. We have all heard about the benefits of bananas. (If you haven't, I suggest you read this article, 14 Banana Health Benefits You Might Know About). But did you know that the peel can tighten up your pores?

I was surprised when I read it somewhere over the Internet. (I'm so sorry I wasn't able to trace the link yet. I'll keep looking!) Anyway, they said that banana peels can tighten pores. I tried it myself and I'm very impressed. VERY IMPRESSED.

What you will need:

1 banana peel (Given the benefits of having banana in your diet, you might as well be the person who eats it.)

What to do:

Apply inside of peel gently all over face, especially the area where you want smaller pores. Do not rub.  Leave it for 10-15 minutes before washing face. Cleanse, tone and moisturize like usual and see the results yourself!

I have huge pores on my nose and upon doing this I observed that my pores were smaller! It's so easy, it's so worth doing! Try it and let me know how it works for you! I am so stocking up on bananas! Good for the brain too!

Tuesday, September 11, 2012

Ginger Tea for Your Bath

Weeks ago, we were practicing for my choir's first concert EVER! With little time to prepare, we practice for hours almost three times a week and with the current weather that's more bipolar than I am when I am on my period, our instruments were in it for some throat setbacks. And our go to? Why Ginger Tea (More popularly known as Salabat here)! And of course, it helped with it's soothing, spicy hot number.

Everything I intake, I research over the Internet for some confirmation. And in my surfing, I found out that Ginger Tea has a lot of skin benefits when you put it in your bath like detoxification, soothes aches and pains, for colds & fever, good blood circulation! And yes it helps soothe menstrual cramps too! I've also read somewhere (I don't remember where, Sorry!) that it's good for dandruff, Psoriasis and removing scars (oooh.)

And of course, being the tea bath girl that I am (try other tea baths like Java Mint, Stevia & Chamomile too),  I decided to try it out. I didn't use any oils. Just good old ginger chopped up. 


What you will need:

A bucket of water
Chopped Ginger
Heater

Instructions:

Place chopped ginger in bucket of water and heat for 20 minutes (The same goes with Ginger tea for oral intake. You can keep reusing while the flavor is still there. It gets spicier every boil.) Add water for the bath and bathe like the usual.

My verdict:

I was suffering from allergies when I tried this. (I got this allergies from trying old perfumes if they have expired. I should charge myself hazard pay. Perfumes are only good for two years. Longer than that and I assure you, you will get bad allergies like mine. I better find a good way for to use these perfumes.) 

It was a concern for me if this would help my allergy condition. I have taken an anti-allergy pill to help me get drowsy and ignore the itch because it's unbearable and unsightly. I rubbed some ginger on my face and body too while in the bath. I don't know if it's the medicine or the ginger but my itch patches are subsiding very quickly. Apart from feeling relaxed, I notice that my skin feels powdery soft after I have towel-dried. Even, my menstrual discomfort is lessened. 

With all these benefits, this is definitely a must do! And if it works so well with my skin, I bet it can do wonders in my scalp. And that's just the tea bath!

Concert

As for our concert, this are the videos if you want to hear them. 

Great Are Your Works

Humayo't Ihayag

I did the solo for 'Great Are Your Works' so I am a living testament that Ginger does work. Goes to show that Ginger is not only voice care material, it's skin care and hair care material too! To the next concert and next ginger bath! 

Wednesday, July 25, 2012

Honey-Oatmeal Face Mask

If you have honey and oatmeal in your pantry, there is absolutely no reason why you shouldn't make this! You can check out the E-how's recipe here. I have decided to decrease the recipe so that there will be fewer surplus.  

What you will need (My decreased version):

3 tsp. instant oatmeal
3 tbsp. hot purified water
1 tsp. honey
Bowl
Spoon to mix

What to do:

Pour water over instant oatmeal and add honey. Mix well. Cool until warm enough to apply to face. Put on your face and do something you like for 30 minutes or more. Wash off with warm water. 

Verdict:

Quantity: There was still some left-over. I might have to reduce again next time by half. Thankfully my dog eats everything! But this recipe will be perfect for two. I suggest that you just apply it on your face because it's a messy clean-up if you ought to put it in other parts of your body. But if you really feel like giving yourself, go right ahead!

Compared with other masks: I like this mask a lot because it doesn't fall off. Unlike the Honey-Cinnamon Glaze (which I love still!), you don't have to worry about spilling it because it's not runny at all. It stays in place until it dries up so you can pretty much do something else if you don't feel like just hanging back and listening to music. (I indulged in reading Calvin and Hobbes Attack of the Deranged Mutant Killer Monster Snow Goons Collection because I am very mature for my age.) And with this you can move your face too unlike when I do the Blackhead Removal Mask, if you move it will crack on you. But different masks, different effects. 

Effect: It's definitely exfoliating and my face feels less oily after this. According to E-how, oatmeal absorbs the oil while honey is anti-bacterial and moisturizing. Perfect combination for me and my oily skin. Next time, I'm adding cinnamon for that wonderful smell! 

According to Green Earth Bazaar, we should use different liquids for this face for different skin types. 

Oily (Purified Water)
Normal (Milk)
Dry (Cream)

I was so tempted to add raisins in this mask (think oatmeal and raisin cookies) but apparently it's better digested than placed on skin. But oatmeal and honey really proves that what's healthy to eat is just as good for your skin. 

Image from:  http://www.oatmeal-soap-shop.com/honey-oatmeal-soap.shtml 

Honey-Cinnamon Glaze For Your Face

I came across 22 Homemade Body Scrubs, Masks and Lotion Recipes by Tip Junkie and like any DIY personal care junkie, I literally flipped out! I can't wait to try all of these things! As I was scrolling through my latest find I saw, The Miracle Mask. It contains only three ingredients that suggestively smells oh-so-good; honey, nutmeg and cinnamon. *Bites lower lip*

I don't have nutmeg because I'm not really a fan. But I did have honey and cinnamon so I decided to take a plunge. 

What you will need:

2 tbsp. Honey
1 tsp. Cinnamon
A bowl and a spoon


What to do:

Mix and apply to face. Lie down and listen to Mindy Gledhill's songs for 20 minutes. Wash off with warm water.


Verdict:

Quantity: This recipe is for three people. I tried it the other day and I had a lot of left over so I shared it with my mom. I tried to convince my dad but he's too macho for honey and cinnamon.  My mom still had enough to put a thin layer on her arms and neck as well. It was kind of messy though. So if you're the only one using it, try to cut the recipe in half so that you don't spoil anything. 

As a mask: It really smells good. I felt like a Krispy Kreme donut basking at this mask's glory. But my mom and I felt a bit of itch using this. We can be allergic to one of the ingredients so please be reminded that before using it on test it on your wrist before applying the whole thing. Thankfully, the itch didn't blotch and we still came out with lovely exfoliated skin. 

Face Massage: Since my face itched a bit, I couldn't sit still and just let it happen. I started massaging my face and boy, was it relaxing. The smell of cinnamon was circulating and it was just heavenly. I didn't matter if I was doing my own face massage because it was so good. 

Remember: When massaging your face, only use your beauty fingers (middle and ring finger) because these two fingers don't have the same pressure as your other fingers, all your fingers all together, or your palm. Our faces are very sensitive that the skin follows the form of the pressure you apply to it. Scary isn't it? So use your beauty fingers and always do an upward-outward circular motion whether you are cleansing, exfoliating, putting toner or moisturizing. It's anti-aging and it's free. 

All in all, I love this mask with the face massage. It made my skin really soft and it really smelled good. And when I washed my face, I didn't mind tasting it a bit (it's really good). If this isn't skin food, I don't know what is!

Wednesday, April 11, 2012

Remove your scars with Aloe Vera!

It's officially summer! Out with shorts and skirts! But with all these heat (almost 35 degrees Celsius), who wants to put lotion on their legs to keep it moisturized? I use Dove soap with 1/3 cream. But with temperature off the charts and a little more you've got fever, it's just not enough! Hello dryness!

Yesterday, I was really searching for a natural way to lighten my leg scars due to cuts that I got from walking my paranoid dogs. I saw in one post that Aloe Vera can actually help lighten scars. And since my mom has a herbal garden, I asked her for a piece of Aloe Vera. I used it on both legs and left it there overnight. The next day, I tested my skin by scratching it. The part where I placed Aloe Vera in didn't leave a mark. I also wax my legs every now and then and when the hair grows there's a time when it's really itchy. Aloe Vera helped relieve it also.


Get your Aloe Vera at Php60-100/seedling. 
Visit https://herbalandherbs.wordpress.com/ for more details. 

What you do with the Aloe Vera is wash it first then cut a knife through the sides so that the thorns will be removed. Then strip off the skin of Aloe Vera and then slide it directly to skin and leave overnight and wash the next day. If you do this everyday, a lot of websites say that your scars will be visibly reduced. I also tried it on my face. It's said to be good for the wrinkles under your eyes! My skin did feel smoother after. Thank God for my mom's herbal garden! I'm doing this all summer! Let's beat the heat, wrinkles, scars and itch with Aloe Vera!  


Is it just me or just looking at its picture is already relieving the heat? Hmm. Yeah. It's just me.

Thursday, March 22, 2012

Lighten Skin with Lemon & Salt Bath

Last night I was showing my mom the effect of my trial homemade bronzer, which was basically just cocoa powder brushed on my cheeks. I even went under the light so she can see clearly. But instead of noticing my bronzed cheeks, she noticed how clear my skin was. 

Days before she told me as I was under the light that I had eruptions and last night she told me otherwise! I do tea baths almost everyday but yesterday I did something completely different. I bathed in lemon with salt. (We're missing the Tequila here!)

I heated some water, added about 9 Kalamansi (Philippine lemon) and added the salt after turning off the heat. Salt will make it hard for the heater to do its job because of its cooling effects.  

My hair was shiny but it wasn't as soft or manageable as when I did my Stevia, Java Mint and Chamomile bath. But it was very shiny. My skin look like it lightened too. I wear T-shirts a lot and the sunburn just below my collar bone is a mainstay for me. But after doing this, my skin visibly lightened in this area. It is not suggested to do this bath everyday because it might be harmful. But if you want lighter skin and clearer complexion, lemon and salt are your kitchen-go to.

Photo from: http://www.ericcressey.com/sodium-intake-is-salt-bad-for-you

Sunday, March 18, 2012

Java Minty Tea Bath

I had a lot of Java mint spare when my parents harvested for the Fresh Mint Chocolate Chip cookies and the Mint Chocolate ice cream I made for them so I figured why not air dry it and make a tea bath out of it. 


This baby came from my mom's garden. Pretty thing, isn't it? Smells great too. 

Air-drying takes about 3 days. I used about 3 tbsps. worth of dried leaves before putting them in boiling bath water. I left it to boil for another 20 minutes. At around 15th minute, the house was filled with the sweet, refreshing smell of Java mint. My mom noticed it first. I completely forgot about heating the water with tea leaves in it. Ha! This is why I do not cook! But, it was incredible like a whole-house aromatherapy session. But the smell just doesn't stay too long. Too bad. 

The bath was incredible. I currently use mentholated shampoo because when it changes weather a lot, I tend to get dandruff. What I notice about Java mint bath is that it's not as mentholated as what we use in commercial shampoos and body washes. It's a lot milder and the smell doesn't stick so long as all good things but the effects are to be in love with. My hair was really shiny and soft and manageable right after and no itch! I had my mom feel my hair and she said it was like a horse's. And I take that as a compliment. 

After talking about a lot of tea baths here, you might think that all tea baths are made the same. Well, no. I'm just lucky that so far because I've tried good teas that have great effect on hair and body. My mom has tried Lagundi tea bath, although it has warmed her entire body on cold days, it didn't make her hair look as nice. So not all tea baths are made the same but I am starting to believe that all are awesome for skin. I haven't used lotion for weeks (apart from the fact that it's summer)  and I can tell you it's far from being dry. 

Thursday, March 15, 2012

DIY Stevia Tea Bath

So another of the tea bags that I have totally forgotten and just expired are the free samples given to me by an organic Stevia gentleman farmer I met. 

And it would be a waste to throw away like the Expired Organic Chamomile tea bags I had. So I did a little research. According to Wisdom of the Ancients, Stevia can heal cuts and sores. It is said also to smoothen wrinkles and make skin soft when they dry from this tea rinse. A woman also claims that it removes aches and pains when put in the bath and is just as relaxing. It's also a good hair conditioner that helps retain hair color and makes the hair stronger. Just leave the rinse at the bath for 5 minutes. 

With my expired Stevia tea bag, it's time to try this ancient secret to sweetness and beauty.

What you need:


Hot bath water
Stevia tea bags (enough to color water)

Steep tea bags for 15 minutes. Remove the tea bags and enjoy. Tea bags may be reused 5 times.

Review:


It's indeed relaxing but it didn't have the extremely calming effect as the Chamomile bath I had last night. I almost fell asleep through dinner. And it did get  my aches and pains I have or maybe it's the hot water. As for the effect on hair, it didn't turn out as soft as the chamomile bath but the shine of my hair was fantastic and it managed to calm my curls. Definitely a must do! Can't wait to do a chamomile-stevia fusion bath!

This is what it looks like when it's fresh by the way.

Get your Stevia at Php60/seedling. 


Wednesday, March 14, 2012

What to do with Expired Chamomile Tea Bags

Our next door neighbor gave us a box of organic chamomile tea bags from London about a year ago. But being busy people that we are, we forget things. And two days ago I found out that it already expired.

Photo from: http://www.whittard.co.uk/tea/herbal/organic_camomile_caffeine_free_herbal_25_teabags.htm
Honestly, I found it a waste to just throw it away so I found a different use for it that's just as effective as the oral intake. I used it in my bath. 

I placed in hot bath water 3 bags of this baby. I shampooed and scrubbed with loofa and rinsed out with chamomile tea.  


I knew of the calming properties of chamomile as a drink and as an essence but as a tea bath, who knew? I was so relaxed right after, you'd think I came from the spa. 


I was well-aware that chamomile can be used for highlighting hair for blondes but not of the other benefits of bathing hair with chamomile tea. My hair was so soft and shiny after. Conditioner got nothing on chamomile tea! And it is said to lighten eye bags too. I have yet to try this!

Which reminds me, I have expired stevia tea bags too - but that's another story. Expired tea bags rock!!! 

Wednesday, February 29, 2012

DIY Cellulite Massage

It started with my New Year's resolution and of course you all know what that is - to be fit. And if you are a girl like me trying to lose the holiday weight while preparing for the summer, things can blow out of proportion. Match it up with picture perfect Hollywood celebrities, any girl even with the knowledge of self-tanners and photoshop would worship any way that can rid them of cellulites. Yes, that's right. Cellulites. My mortal enemy no. 1 (for now). 

I've read up a lot of articles in the internet about cellulite; how it can removed, how it's possible, how it's not possible, how it can be done naturally, how it can be done topically, how to hide it. But among which that I found very attractive to try is the slimming massage, which is said to remove cellulite when you have it done regularly. 

If you are here then you already have knowledge about what cellulites are. But for the sake of clarity I shall explain it anyway. Or better yet show you. 

Image from: http://purelyfitness.com/cellulite-busting-exercises

So cellulites are the dimples that come out when you press your thighs in such a way. But it is not limited to that. It can come out even if you are not pressing it, which is much worse.  

In essence, cellulites are fat deposits. I don't know if you can really get rid of it because they also say that it's genetic. But if you can minimize it then I think it's worth the effort. 

When you search the internet about eliminating cellulite naturally, you'll find lots of diet tips, thigh exercises and coffee ground rub or orange home remedies. I don't think there is but one solution to it so might as well try it all. 

I'm not one to diet. And I bake too! So diet, I'm sorry. 

Photo from: http://www.twofatchickxlosingweight.com/2012/03/its-not-you-its-me/


So to battle it out with my cellulites in this battle royale, I fight with two weapons; deadly thigh exercise and with DIY cellulite massage. 

I found this link in the Internet as I was doing my due diligence.


Among everything I've watched, this was the most no-brainer of all. It's French though but it doesn't matter as long as you can see the strokes. I don't use any slimming oil. I used just aloe vera lotion, coconut baby oil and sunflower oil interchangeably. My favorite is Human Nature's Sunflower Oil.

I find it fun because when I press myself, I feel the water retained in my thighs. You'll know what I mean when you try this. And there is this burst-pop feeling. It's like popping bubble wrap but in a less pronounced way. And sometimes I lose track of time because not only is it relaxing but I have fun popping myself. Ha ha!

I asked my Physical Therapist friend if slimming massages are effective. She said bluntly that it doesn't do what it's supposed to do. What it does though is that it helps in blood circulation. And if you have exercised prior to the massage, it will help break the lactic acid formed that causes body aches. So in effect, massages will make the pain bearable so you can exercise the next day.

But what she said next was even more interesting. She said slimming massages can be slimming for the person who does the massage. I am 120 lbs and with my weight, self-massage of 30 minutes can burn me 114.31 calories. (Check yours here.) Now that's an incentive I'm willing to take! Two birds with one stone!

I don't know if this self slimming/cellulite massage works but here's an observation from me. I've been doing this for a month now and the bubble wrap pop effect is not as bad as when I started and with the thigh exercises I've been doing, I feel better about myself. I feel like I am more connected to myself more than ever. (But that's the cheesy part).

In the end, there is only one thing we can agree on and that's massages are love no matter the source. So have massages done or do it yourself!