Showing posts with label natural. Show all posts

Monday, April 6, 2015

An Eggziting Way to Remove Blackheads

It is an enigma to me too why it took me this long to post about this, especially when I practically do this every two weeks (sometimes weekly if my blackheads are going Spartan army on me.)

I once removed my blackheads using Nu Skin. (You can check the post here.) But I have long abandoned it because I opted for a more natural, if not more organic, facial care. But it’s really mostly because it’s the cheaper option (let’s be honest). It’s just as effective without the cancer-causing agents in tow. So, why not right?

So how does one remove blackheads without store-bought face masks (which don’t work on me) and without going to facial centers that uproot blackheads through pricking and squeezing? Ouch!

Well, it is closer to you than you think.

Image from: www.rsc.org


You will need the following:
An egg
A sheet of toilet paper
Scissors
Soap
Ice cubes

Directions:

1. Separate the yolk and the egg white, and then get about a teaspoon of egg white. (This depends on the size of your face. I have a lot of leftovers when I use 1 teaspoon.)
2. Next, fold a sheet of toilet paper in half so that it forms a triangle. Cut it in the middle. One ply of this paper triangle will serve as your nose strip.
3. Wash your face with gentle soap and pat dry.
4. Apply the teaspoon of egg white on your face and your neck using your beauty fingers. Making sure you only apply it upwards to avoid wrinkles.
5. Slowly dab your makeshift nose strip using your fingers. You need to be very gentle when you do this because you might destroy the toilet paper.
6. After applying the nose strip, apply a second coating of egg white on your nose.
7. Let it dry. This will take about 30 minutes. Try not to move around so much or else the mask will crack. If air enters the mask, it might itch.
8. When it’s all dried out, slowly pull your nose strip. I pull one side at a time
9. You can repeat this again if you have more blackheads left (also known as Spartan mode), but just limit it to thrice in a row. If you are satisfied the first time, you can wash your face and apply the ice cubes on your face. This will close your pores and prevent dirt from coming in, at least temporarily.

Put the leftover egg white where you dipped your fingers in your plants. It makes a good fertilizer.

As for the remaining egg white, you can store it. It usually keeps for a few days in an airtight container. I personally prefer to cook it with the initially separated yolk, and crack open a fresh every time I extract my blackheads.

If you want to use free range eggs, that’s so much better! Free range eggs do not have hormones in it.

Let me know if this works for you!
Friday, February 1, 2013

Tighten Pores With Banana Peel!

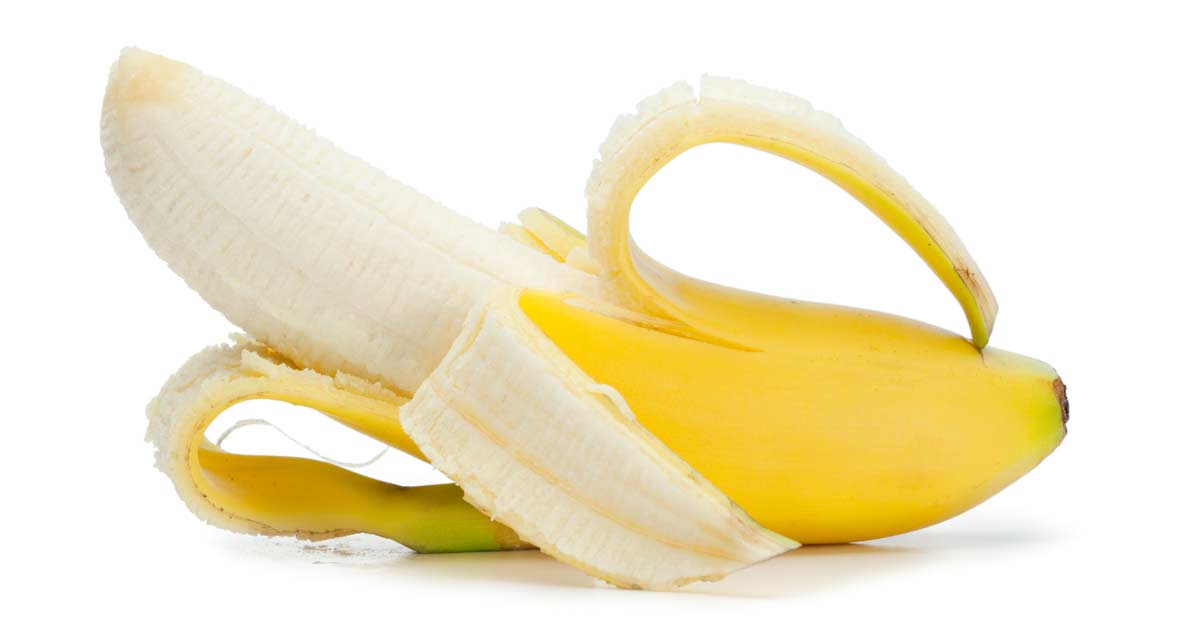
Image from: foodfacts.mercola.com


Apparently, banana peels aren't just for slapstick comedies. We have all heard about the benefits of bananas. (If you haven't, I suggest you read this article, 14 Banana Health Benefits You Might Know About). But did you know that the peel can tighten up your pores?

I was surprised when I read it somewhere over the Internet. (I'm so sorry I wasn't able to trace the link yet. I'll keep looking!) Anyway, they said that banana peels can tighten pores. I tried it myself and I'm very impressed. VERY IMPRESSED.

What you will need:

1 banana peel (Given the benefits of having banana in your diet, you might as well be the person who eats it.)

What to do:

Apply inside of peel gently all over face, especially the area where you want smaller pores. Do not rub.  Leave it for 10-15 minutes before washing face. Cleanse, tone and moisturize like usual and see the results yourself!

I have huge pores on my nose and upon doing this I observed that my pores were smaller! It's so easy, it's so worth doing! Try it and let me know how it works for you! I am so stocking up on bananas! Good for the brain too!

Wednesday, July 25, 2012

Honey-Oatmeal Face Mask

If you have honey and oatmeal in your pantry, there is absolutely no reason why you shouldn't make this! You can check out the E-how's recipe here. I have decided to decrease the recipe so that there will be fewer surplus.  

What you will need (My decreased version):

3 tsp. instant oatmeal
3 tbsp. hot purified water
1 tsp. honey
Bowl
Spoon to mix

What to do:

Pour water over instant oatmeal and add honey. Mix well. Cool until warm enough to apply to face. Put on your face and do something you like for 30 minutes or more. Wash off with warm water. 

Verdict:

Quantity: There was still some left-over. I might have to reduce again next time by half. Thankfully my dog eats everything! But this recipe will be perfect for two. I suggest that you just apply it on your face because it's a messy clean-up if you ought to put it in other parts of your body. But if you really feel like giving yourself, go right ahead!

Compared with other masks: I like this mask a lot because it doesn't fall off. Unlike the Honey-Cinnamon Glaze (which I love still!), you don't have to worry about spilling it because it's not runny at all. It stays in place until it dries up so you can pretty much do something else if you don't feel like just hanging back and listening to music. (I indulged in reading Calvin and Hobbes Attack of the Deranged Mutant Killer Monster Snow Goons Collection because I am very mature for my age.) And with this you can move your face too unlike when I do the Blackhead Removal Mask, if you move it will crack on you. But different masks, different effects. 

Effect: It's definitely exfoliating and my face feels less oily after this. According to E-how, oatmeal absorbs the oil while honey is anti-bacterial and moisturizing. Perfect combination for me and my oily skin. Next time, I'm adding cinnamon for that wonderful smell! 

According to Green Earth Bazaar, we should use different liquids for this face for different skin types. 

Oily (Purified Water)
Normal (Milk)
Dry (Cream)

I was so tempted to add raisins in this mask (think oatmeal and raisin cookies) but apparently it's better digested than placed on skin. But oatmeal and honey really proves that what's healthy to eat is just as good for your skin. 

Image from:  http://www.oatmeal-soap-shop.com/honey-oatmeal-soap.shtml 

Tuesday, May 8, 2012

Make your Own Gugo Shampoo

My mom has been living green for quite some time and have finally dispatched the use of shampoo and conditioner from her toiletries - but not without green replacement of course! She makes Gugo Shampoo, which is from the Gugo bark. Gugo is like the ancient native shampoo. Ask the old people and they know just what it is. My mom says that it softens hair and makes it shiny and healthy and that it even removes dandruff!


It's fairly easy to make and here's what you will need:

1 Gugo bark
Bowl of Water (size of bowl is completely up to you)
Old shampoo bottle/s
1 Kalamansi/ Philippine Lemon (per shampoo bottle)
1/2 tsp. vinegar (per shampoo bottle)

What to do:

Put Gugo bark into bowl of water and just leave it there for 30 minutes. At 30 minutes, you'll see that it's all lathered up. Transfer to shampoo bottles. Add juice of one squeezed Kalamansi/Philippine lemon and half a teaspoon vingear (any kind you have) per bottle. 

Usage:

Wet hair and massage into scalp. Rinse. 


My verdict:

I've been so used to using commercial shampoo that lathers up that this one didn't seem right at first but I have reason to believe that it might just be effective just as they say. I have a sensitive scalp, if a shampoo or conditioner does not work for me, I'd be sure to have dandruff in a couple of hours. And with the hot, hot weather here, I was half-expecting I would be itching up. But it turned out to be the opposite! 

My hair is soft, manageable and dandruff-free! Surprise, surprise!

CAUTION: Avoid contact with eyes.

HOW TO BUY GUGO: STORE PICK-UP or DELIVERY.

STORE PICK-UP: Visit us at 805 Jackielou Ville, Brgy. BF Homes, Paranaque City.
PRICE/PC.: Php13.50
FOR SHIPPING
HOW TO PLACE YOUR ORDER FOR SHIPPING: (Any of the following)
A. E-mail us at elrtinasas@gmail.com;
B. Text us at 0917 578 03 43;
C. Personal Message us at our FB page: https://www.facebook.com/HerbalnHerbs
D. Contact us at https://herbalandherbs.wordpress.com/
PAYMENT: You will be given a BPI savings account name and number where you can deposit your payment.
CONFIRMING PAYMENT: Upon payment deposit, kindly notify us through text, e-mail or FB personal message. Please include your complete name, address (where you want it shipped) and contact number. We will then check your deposit and confirm receipt.
SHIPPING: Upon shipment, we'll send you the tracking number for your reference. Expect your package within 1-3 working days.

Thursday, March 22, 2012

Lighten Skin with Lemon & Salt Bath

Last night I was showing my mom the effect of my trial homemade bronzer, which was basically just cocoa powder brushed on my cheeks. I even went under the light so she can see clearly. But instead of noticing my bronzed cheeks, she noticed how clear my skin was. 

Days before she told me as I was under the light that I had eruptions and last night she told me otherwise! I do tea baths almost everyday but yesterday I did something completely different. I bathed in lemon with salt. (We're missing the Tequila here!)

I heated some water, added about 9 Kalamansi (Philippine lemon) and added the salt after turning off the heat. Salt will make it hard for the heater to do its job because of its cooling effects.  

My hair was shiny but it wasn't as soft or manageable as when I did my Stevia, Java Mint and Chamomile bath. But it was very shiny. My skin look like it lightened too. I wear T-shirts a lot and the sunburn just below my collar bone is a mainstay for me. But after doing this, my skin visibly lightened in this area. It is not suggested to do this bath everyday because it might be harmful. But if you want lighter skin and clearer complexion, lemon and salt are your kitchen-go to.

Photo from: http://www.ericcressey.com/sodium-intake-is-salt-bad-for-you

Sunday, March 18, 2012

Java Minty Tea Bath

I had a lot of Java mint spare when my parents harvested for the Fresh Mint Chocolate Chip cookies and the Mint Chocolate ice cream I made for them so I figured why not air dry it and make a tea bath out of it. 


This baby came from my mom's garden. Pretty thing, isn't it? Smells great too. 

Air-drying takes about 3 days. I used about 3 tbsps. worth of dried leaves before putting them in boiling bath water. I left it to boil for another 20 minutes. At around 15th minute, the house was filled with the sweet, refreshing smell of Java mint. My mom noticed it first. I completely forgot about heating the water with tea leaves in it. Ha! This is why I do not cook! But, it was incredible like a whole-house aromatherapy session. But the smell just doesn't stay too long. Too bad. 

The bath was incredible. I currently use mentholated shampoo because when it changes weather a lot, I tend to get dandruff. What I notice about Java mint bath is that it's not as mentholated as what we use in commercial shampoos and body washes. It's a lot milder and the smell doesn't stick so long as all good things but the effects are to be in love with. My hair was really shiny and soft and manageable right after and no itch! I had my mom feel my hair and she said it was like a horse's. And I take that as a compliment. 

After talking about a lot of tea baths here, you might think that all tea baths are made the same. Well, no. I'm just lucky that so far because I've tried good teas that have great effect on hair and body. My mom has tried Lagundi tea bath, although it has warmed her entire body on cold days, it didn't make her hair look as nice. So not all tea baths are made the same but I am starting to believe that all are awesome for skin. I haven't used lotion for weeks (apart from the fact that it's summer)  and I can tell you it's far from being dry. 

Thursday, March 15, 2012

DIY Stevia Tea Bath

So another of the tea bags that I have totally forgotten and just expired are the free samples given to me by an organic Stevia gentleman farmer I met. 

And it would be a waste to throw away like the Expired Organic Chamomile tea bags I had. So I did a little research. According to Wisdom of the Ancients, Stevia can heal cuts and sores. It is said also to smoothen wrinkles and make skin soft when they dry from this tea rinse. A woman also claims that it removes aches and pains when put in the bath and is just as relaxing. It's also a good hair conditioner that helps retain hair color and makes the hair stronger. Just leave the rinse at the bath for 5 minutes. 

With my expired Stevia tea bag, it's time to try this ancient secret to sweetness and beauty.

What you need:


Hot bath water
Stevia tea bags (enough to color water)

Steep tea bags for 15 minutes. Remove the tea bags and enjoy. Tea bags may be reused 5 times.

Review:


It's indeed relaxing but it didn't have the extremely calming effect as the Chamomile bath I had last night. I almost fell asleep through dinner. And it did get  my aches and pains I have or maybe it's the hot water. As for the effect on hair, it didn't turn out as soft as the chamomile bath but the shine of my hair was fantastic and it managed to calm my curls. Definitely a must do! Can't wait to do a chamomile-stevia fusion bath!

This is what it looks like when it's fresh by the way.

Get your Stevia at Php60/seedling. 


Wednesday, March 14, 2012

What to do with Expired Chamomile Tea Bags

Our next door neighbor gave us a box of organic chamomile tea bags from London about a year ago. But being busy people that we are, we forget things. And two days ago I found out that it already expired.

Photo from: http://www.whittard.co.uk/tea/herbal/organic_camomile_caffeine_free_herbal_25_teabags.htm
Honestly, I found it a waste to just throw it away so I found a different use for it that's just as effective as the oral intake. I used it in my bath. 

I placed in hot bath water 3 bags of this baby. I shampooed and scrubbed with loofa and rinsed out with chamomile tea.  


I knew of the calming properties of chamomile as a drink and as an essence but as a tea bath, who knew? I was so relaxed right after, you'd think I came from the spa. 


I was well-aware that chamomile can be used for highlighting hair for blondes but not of the other benefits of bathing hair with chamomile tea. My hair was so soft and shiny after. Conditioner got nothing on chamomile tea! And it is said to lighten eye bags too. I have yet to try this!

Which reminds me, I have expired stevia tea bags too - but that's another story. Expired tea bags rock!!! 

Wednesday, March 7, 2012

DIY Hair Spa

My mom has been keeping secrets from me. And this is a good one. I've been telling her for weeks now that her hair looks more wonderful than usual. Her secret, VINEGAR. Her last rinse in the bath is aloe and vinegar but she mainly used vinegar to be a preservative of aloe vera because it starts to smell after awhile. I researched about vinegar and its benefits when used on hair and apparently a lot of people already know about this the secret behind vinegar.

Image from: http://www.realsimple.com/home-organizing/cleaning/all-natural-cleaning-solutions/vinegar-0


So vinegar... Who knew right? I certainly did not. And when I found out about it this afternoon, I tried it out immediately.

So this is what you'll need:

2 cups of warm water
1 Tbsp. of vinegar (any kind you want)

Basically, you're going to mix this together and then use it as a last rinse when you take a bath. You leave it on for 30 minutes then rinse it again to remove the vinegar smell. 

I've tried this and it's wonderful! The effect is immediate. After the last rinse, I noticed my hair feels different already. I just air dried my hair after the second rinse and it was manageable and shiny and not a whiff of vinegar! Usually my hair does not know which way to go at this point so I cannot get over the fact that it's down and easy with just vinegar! 

I read here that you can do it as much at three times a week. I'm definitely doing it weekly! It's a good antiseptic for skin too and hey, it kills mildew in the bathroom. Three birds with one stone all for the price of vinegar!  

Tuesday, March 6, 2012

DIY Waxing

So I have mutant blackheads and the same goes for my hair. I used Veet until recently. I've tried the spray, cream and the strips. But it takes an allergic reaction gone wild to make me stop using Veet. My legs were a disaster and had wounds all over here. And that was when I realized that it was time to go organic on this one as well.

There are a lot of waxing clinics that started sprouting here in BF Homes but my favorite of which is Lay Bare which has a lot of branches all over the Philippines. My favorite branch of which is the one in Festival Mall. And my favorite waxer is Cristy! She's not only good with her hands but she's so friendly too! We've become fast friends after I first had my waxing done with her. And I would totally recommend her to others!

But sometimes I get TOO busy that I don't have the time to go out of my way to have someone wax me up! And that was when I discovered Strip It in the internet.

Image from: http://strip-it.blogspot.com/


It's made of mainly sugar, honey and drops of kalamansi (Philippine lemon). No harmful chemicals and no heating. You just apply the sugar syrup downward onto skin, put the washable cloth that comes with the kit and then pull upward! Hair out! Gorgeous exfoliated skin in! I think it's the same thing they use in waxing salons here.


I've tried it on my legs. The 200 ml kit serves two uses for me (just for the legs). It costs Php200 inclusive of delivery. It was okay but it proves to be hard to do because you can't really pull everything out and I had to put myself through different positions just to get everything covered. Learning curve. But it proves to be easy to apply on the underarms. When you go to a waxing salon, underarm waxing is charged around Php150 per visit.

Well, I'm not going back to shaving with my DIY underarm shaving. Not only does it save time, it's economical and chemical-free. When you wax, hair growth tends to be slower. For the underarms, it's said to take three weeks before you need to do it again. So that really makes me a mutant. As for the legs, waxing can last you almost 3 months. Again, I am a mutant.

Just a quick tip, if you're going to wax it's best to moisturize well days before. I waxed myself last year, I think I had dry skin then and I had breakouts when hair on my legs started to grow. I couldn't wear a skirt for a long time. Also remember to follow the instructions in the manual of the kit because there are precautions there that you cannot wash waxed part with soap as well as no exposure after waxing  to avoid allergic reaction.

Photo from: http://weddings-plaza.com/perfect-legs/

Happy DIY waxing!

DIY Hand and Foot Spa

In my last post about Sunflower Oil, I sort of bashed Olive oil and I feel bad about it. So I'm posting it to make up to it! Ha ha!

I was in National Bookstore when I read from a beauty book about Sugar scrub. Now, I don't know about you but it was the first time I've heard of it because when I go to the spa or nail salons, all I ever get are salt scrubs with different scents like strawberry and mint. The idea of a sugar scrub was already very attractive to me since I am a sweet tooth. I tried it as soon as I got home and all I can say is I loved it.

What was so good about it was it was so easy to prepare. It's just olive oil and sugar. I didn't measure it anymore. You can already gauge by looking. There has to be more sugar than olive oil but you have to make sure that the sugar is coated by enough olive oil.

I first scrubbed my feet. It's like an automatic 2-in-1 hand and foot spa because it works your hand and foot at the same time. I'm so ticklish so I rarely have a foot spa done. I thought if I did it myself, it wouldn't tickle as bad but it still did. After this self-pampering, I was the happiest person on earth. My feet and hands were as soft and smooth as my face. I wish I was kidding too but no! It's really true.

There were additional instructions like put a drop of olive oil in your hand moisturizer before applying before bed and to cover hands with cotton gloves and feet with socks but I didn't go the extra-mile anymore. I was pretty content. I was exfoliated and happy. My friend does a sugar scrub on her body once a month and she said it's just as great. I tried it but I find the clean-up a little problematic with all the ants around. I guess that's why salt scrubs make better body scrubs than sugar. But for my hands and feet, I go sugar all the way!

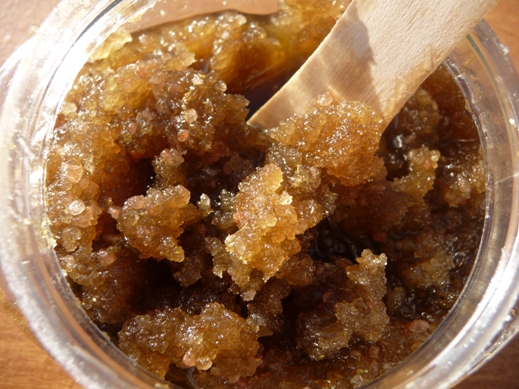
I used white sugar for this one but that's because I am not using Muscovado or Coconut sugar yet. That's your organic option. When I finish all my white sugar, I'm trying out any of these two brown sugars next. Looks luscious and sinful, don't you think?

Photo from: http://mysocalblog.com/2012/02/diy-%E2%99%A5-beauty-%E2%99%A5-brown-sugar-body-scrub-recipe.html