Showing posts with label homemade. Show all posts

Wednesday, October 31, 2012

The Best DIY Wax Recipe Ever!


Call me biased but I’m not going to be shy about this because when I say this is the best DIY wax recipe ever, it is the best DIY wax recipe ever. You see, I’ve tried them all. I have spent on a few kilos of white sugar, burned myself several times trying countless tutorials over the Internet but none of which were close enough to the recipe I wanted.

So what do I want in the best recipe ever? Well, for starters, I don’t like the idea of heating it before it is applied because I’ve burned myself several times due to clumsiness and overexcitement combined, and let me tell you, scars aren’t exactly nice fixtures on your legs. Second, I want it cheap, easy and something I can do myself at home. And third, easily clean up. And after several experiments, I am happy to report to you that I finally got it right and now, so can you!

What you will need:

½ c. granulated sugar
1/8 c. molasses
1/8 c. vinegar or lemon juice
¼ c. water
Pan
Spoons
Measuring Cup
Container for the Wax
Popsicle stick/Applicator
Cut cloth (Make sure not stretchable)

What to do:

  1. Melt the sugar completely in the pan in slow fire. Make sure you mix it so you avoid burning it.

2. Mix molasses, vinegar or lemon juice and water in measuring cup. Make sure it is well mixed.


3. When the sugar is completely melted, add the mixed wet ingredients into pan. Melt the sugar syrup stuck in the pan. Whenever the mixture turns frothy remove the pan from the fire until it is down to simmering point. This will avoid sugar from burning.  


4. When nothing’s stuck in the pan, transfer it to a heat-resistant container. Let it cool. Don’t seal immediately.


5.  When cool, apply mixture in area you want to pull hair. With this, a little goes a very long way so make sure you spread thinly. Put the cloth, pat it downward and pull upward. Re-do this until the wax can no longer remove hair. Just re-apply wax to skin and pat and pull.


6. To wash legs, just use water. You can also reuse the cloth and applicator/popsicle stick. Wash it by leaving it in water until all the sugar’s gone. If you have sugar wax leftovers, store them in an airtight container, preferably microwave safe. Keep the container sealed.

I couldn’t be happier about this recipe! Now I can confidently wear skirts, dresses and shorts! Try it yourself and expose those legs! Enjoy!


Thursday, March 15, 2012

DIY Yakult-flavored Yogurt

I was supposed to try out making yogurt but since I forgot to buy yogurt at the grocery store for my starter set and we have Yakult, I decided to make Yakult milk instead.

I wanted a really CREAMY yogurt so I bought my favorite powdered milk, Bear Brand. But creamy Yakult milk, is another thing worth trying.

Since I baked fabulous Fresh Mint Chocolate Chip cookies and making Yakult milk needed oven assistance, I decided to make it after the baking. 

What you're going to need:

1 liter of water
1 pack of 300 g. powdered milk of your choice
1 pc. Yakult

Oven

1. Preheat your oven to 250 degrees Celsius. (Better if you bake first so it's more economical.)
2. Mix the three ingredients together in oven-proof bowl. Put in oven at 250 degrees then turn off the oven. 
3. Leave mixture undisturbed for 12-14 hours. This is what it looks like after 12 hours.


And when you mix it, you will see some formed lumps.


4. Chill for 2 hours and enjoy! Add sugar if you want to taste.


Review:


The consistency reminds me of cottage cheese that's more runny.


It has the tangy taste of yogurt and the aftertaste of Yakult without the sugar. Definitely, an acquired taste. Sugar makes it easier to down just make sure you dissolve the sugar well.  But the health benefits make it totally worth it. For more information on Yakult, visit http://www.yakultusa.com/. Cheers to healthy intestines!

Wednesday, March 14, 2012

DIY Fresh Mint Chocolate Ice Cream

A new twist to an already tested recipe! I've posted before about DIY Ice Cream.  I've always wanted to try mint ice cream and since my parents have java mint (also used on my DIY Fresh Mint Choco Chip cookies), I thought I might as well make ice cream. 

What you will need:

2 all-purpose cream
20 fresh Java mint leaves
1 can condensed milk
1 c. chopped chocolate

So same recipe as DIY ice cream only difference is that we'll be heating the cream in a sauce pan in low fire with 20 leaves of Java mint. Do not boil. Keep stirring the cream until there are bubbles at the side of the pan. Remove from heat and cover pan for 30 minutes. This is what you call steeping. The same thing is done when you make tea. 

After 30 minutes, sift the tea leaves and press it down so all the flavor will go to the cream. Refrigerate cream for about 2 hours or until it looks thick and not runny. Whip it until soft peak. Add chocolate chips to your condensed milk and fold into whipped mint cream. Refrigerate for 6 hours or until it has solidified.

Get your Peppermint at Php60/seedling. 
Visit https://herbalandherbs.wordpress.com/ for more details. 

I got this idea from Simply Recipes and merged it with the easy recipe I got. Turned out well except that again, I dread bittersweet chocolate. (Just a little more and the bittersweet chocolate will all be gone from the pantry. *Evil laugh*)

But it does look good, doesn't it?


DIY Fresh Mint Chocolate Chip Cookies (Sugar-free)

A friend of mine has been requesting mint chocolate chip cookies from me for the longest time and it is only now that I found the time to finally try making them. Sure there are available mint food essence available in the market but fresh is always better! And since my parents have an herb garden, I might as well take advantage!

Get your Peppermint at Php60/seedling. 
Visit https://herbalandherbs.wordpress.com/ for more details. 

I got this recipe from Une Gamine dans la Cuisine

Group A:
1 1/2 cups of all-purpose flour
1/2 tsp of salt
1/4 tsp of baking soda

Group B:
1/2 cup or 113 g. unsalted butter, at room temperature
165 g. coconut sugar
1 egg
1 tsp. pure vanilla extract

Group C:
1 cup of semi-sweet chocolate chopped
1/4 cup of chopped fresh mint leaves (or food processed)

1. Sift Group A together. 
2. Cream butter and sugar for 10 minutes (KitchenAid speed 4). Add egg and vanilla then mix for 30 sec. (KitchenAid speed 6). 
3. Add Group A to creamed mixture in 3 additions. Mix only until no traces of flour can be seen. Scrape sides as needed. 
4. Add Group C and fold manually until well incorporated. 
5. Refrigerate for 3 1/2 hours. But you can chill for 30 mins if you cannot wait. (I couldn't wait.)
6. Scoop dough (approx. 1 tbsp./ pc.) in greased cookie sheet. Put flour in scoop as needed so that dough doesn't stick. Place cookie dough one inch apart each other in cookie sheet.  
7. Bake at preheated oven temperature 180 degrees Celsius for 7 minutes. Leave in cookie sheet for 10 minutes before transferring to cooling rack. 

Makes 20. 

Recipe Review:

I think I've mentioned in my  post for DIY ice cream that I'm not a big fan of chocolate cake or ice cream. It's the same with cookies but it's always nice to bake for your mom who worships chocolates, yes? 

What I don't like about my first attempt is the fact that I used bittersweet chocolate. It was the only thing available in the pantry. I'm weak against bitter stuff because I'm sweet. Ha ha! My mom loved it though. She's a sucker for all things bitter. Eew. 

I like how the cookie is firm on the sides and chewy and wonderfully moist on the inside. The green patches are not as visible when you see the cookies in person. I used flash for this photo. 


I guess the only down side to using fresh mint leaves in your cookies is that it tends to get stuck between your teeth. But if minty fresh breath after a sweet treat is what you are after, this cookie will not disappoint. Will definitely make them again but this time with semi-sweet chocolate.

Get your Peppermint at Php60/seedling. 
Visit https://herbalandherbs.wordpress.com/ for more details. 

Tuesday, March 13, 2012

DIY Yellow Cake with Cookies 'n Cream Frosting

I've been a sucker for cookies 'n cream. When I was about 9 or 10, my dad came home with a lot of Hersheys cookies 'n cream chocolates. I devoured a bag on a one-way day trip. It's just really weird because I'm a big fan of white chocolate but not of Oreos. 
Photo from: http://-foodporn.tumblr.com/post/22577889546
I'm still no fan of oreo, but cookies 'n cream? Count me in, most definitely! 

I'm also a HUGE fan of yellow cake so I married these two favorites in one, which was an amazing experience like falling in love for the first time. 

I used Smitten Kitchen's yellow cake recipe which was intended for caramel cake but I haven't perfected caramel yet. Wait and see, caramel, I shall get you right soon! 

For the yellow cake

Group A:
2 c. cake flour
1 tsp. baking powder
3.4 tsp. baking soda
1/2 tsp. salt

Group B:
1/2 c. or 100 g. butter (at room temperature for 30 mins.)
3/4 c. or 160 g. white sugar
2 large ORGANIC eggs
1 tsp. vanilla

1 c. buttermilk

1. Preheat oven to 180 degrees Celsius. Grease an 8-inch square pan, put parchment paper and grease paper. I like using my 9-inch round pan for this recipe instead.
2. Sift together Group A.
3. Cream butter and sugar for 10 minutes (KitchenAid mixer speed 4). Add one egg at a time and mix (KitchenAid mixer speed) for 30 seconds. Add vanilla with last egg and mix. 
4. Add all the buttermilk and mix. 
5. Add in Group A to mixture in 3 additions. 
6. Put in pan and rack pan to rid of air bubbles. 
7. Bake for 35-40 minutes or until the toothpick comes clean.
8. Cool in pan for 10 minutes before transferring to rack. 
9. Cool for an hour before frosting. 

Important: 

I studied baking before and never in my life was the liquid (buttermilk in this instance) added first before the dry ingredients (flour, baking soda, baking powder, salt). But it totally works with this recipe so don't deviate, otherwise there will be a lot of holes in the cake. Trust me, I know. I've tried. 

Organic eggs: 

You have the option of using ordinary eggs but I tell you organic eggs make a lot of difference. I'm sure some of you know that yellow cake gets their color from the yellow of the egg. Let me tell you ordinary egg yolks pale in comparison with organic egg yolks. Not only is the color better, the cake is so much fluffier also! I haven't tried organic eggs with chiffon cakes but I can only imagine how wonderful it would be! I can't wait!

Photo from: http://en.wikipedia.org/wiki/Yellowcake

Not my picture. Ha! I really have to take pictures of the goodies I bake before they're gone. 

For the frosting, I used Bake Space's wonderful cookies and cream frosting. 

1/2 c. or 100 g. unsalted butter
1 3/4 c. or 190 g.  powdered sugar
pinch of salt
1/3 c. or 80 g. whipping cream
1/2 tsp. vanilla
crushed oreos

1. Cream butter and powdered sugar and salt. 
2. Add whipping cream and vanilla. 
3. Fold oreos. 

Crushing oreos: I use my food processor to make oreos into a powder. I not only put it in the frosting, I'd like to top the cake too with it. So yum! 

Craving!!!

Below are some ingredient substitutes you can make:

For the cake:

Cake Flour (1 cup)
2 tbsp. corn starch + all purpose flour to make 1 cup

Buttermilk (1 cup)
1 tbsp. vinegar + skim milk

For the frosting:

Whipping cream
Use all-purpose cream

Computing calories:

Yellow cake (accdg. to Calorie-charts) = 245.28/slice
Cookies 'n cream frosting (accdg. to Food) = 235.2/slice
Total = 481 calories/slice of this delish recipe

At this point, I really don't care about the calories, I mean if you've tasted it, you'll know it's worth it! But in case you are trying to lose some weight, here are activities you can do to rid of yourself the guilt trip. And as I've mentioned in my red velvet cupcake post, you can burn 168 calories just by baking (and cleaning up. It's really part of it.) 

So get up bake and enjoy!

Monday, March 12, 2012

DIY Red Velvet Cupcakes

Now this is a true story but I never tasted red velvet cupcakes until I baked them one day. I was like 'what's all the fuss?' with this little thing so I decided to try it out. 

Photo from: http://gimmesomeoven.com/red-velvet-cupcakes-with-cream-cheese-frosting/

I used Joy of Baking's recipe. This isn't my picture though but it looks a lot like it! I couldn't take a good picture of it because I'm still not very good at designing. I make really good FUNCTIONAL cakes though. It serves its sweet purpose. 

For cupcakes: 

Makes 12

Group A:
1 1/4 c. or 125 g. cake flour
1/4 tsp. baking powder
1/4 tsp. salt
1 tbsp. Dutch-processed cocoa

Group B: 
1/4 c. or 57 g. unsalted butter (at room temp for 30 minutes)
150 g. White Sugar
1 large egg
1/2 tsp. vanilla

Group C: 
1/2 c. buttermilk
1 tbsp. red food coloring

Group D: 
1/2 tsp. baking soda
1/2 tsp. distilled white vinegar

1. Line muffin tin and preheat oven at 180 degrees Celsius.
2. Sift Group A together and whisk them together. 
3. Cream butter & sugar for 10 minutes (KitchenAid mixer Speed 4). Add egg and vanilla and mix for 30 seconds (KitchenAid mixer Speed 6). 
4. Mix Group C together. 
5. Add Group A and Group C to creamed mixture alternately in three additions, starting and ending with Group A. 
6.  Combine Group D. Let it finish fizzing before folding into batter. 
7. Scoop to the muffin tin evenly and bake for 18-23 minutes until toothpick comes out clean. 
8. Cool in tin for 10 minutes before putting in the cooling rack. 
9. Cool for an hour before putting frosting. 

Ingredient Substitution:

Cake Flour (1 c.)
2 tbsp. corn starch + all purpose flour (to make 1 c.)

Buttermilk (1 c.)
1 tbsp. vinegar + skim milk (to make 1 c.) Let stand for 5 minutes.

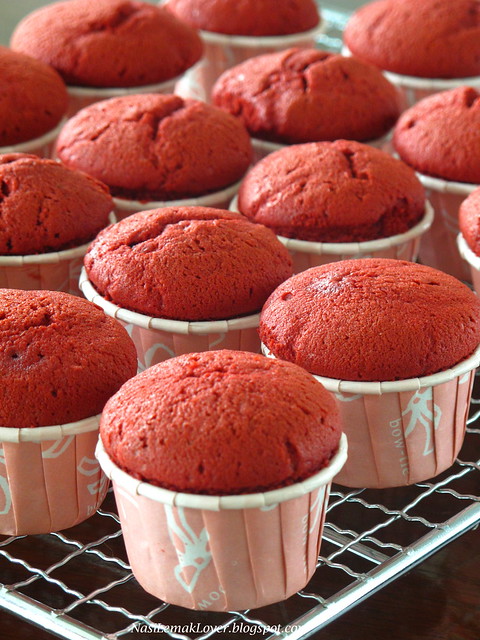
Photo from: http://nasilemaklover.blogspot.com/2012/01/red-velvet-cake-cupcakes-with-cream.html

For the cream cheese frosting:

8 oz. chilled cream cheese (cut into pieces in you're using a handmixer)
1/2 tsp. vanilla
1/2 c. or 60 g. powdered sugar
2/3 c. or 160 ml. chilled heavy cream

1. Whisk cream cheese for 10 minutes (KitchenAid Speed 4).
2. Add vanilla and powdered sugar, whisk until well-mixed.
3. Add cream and whisk until thick enough to pipe.

Ingredient substitution


Heavy cream
Use all-purpose cream.

Review:

I just love this recipe! It's simple and it's really good. Although, I just made 11 cupcakes out of it. I should learn how to distribute scoops evenly. 

As for the frosting, it's really good but it's too much for me and my family. We love sugar as much as the next person but we don't really need large swirls of cream cheese frosting. So the next time I'm making this, I'm cutting the recipe in half or I'll make two batches of cupcakes. 

And if you're worried about your waistline, Starbuck's red velvet cake makes 430 calories. Baking can burn 168 to 348 calories according to this site. If you're using a KitchenAid mixer or a  hand-mixer, we can safely assume we burn 168 calories - I mean we will still be cleaning the kitchen up while waiting for the cupcakes to bake. While waiting for the cupcakes to cool, scrub a bathroom and you've already offset the 'caloric damage' of a red velvet cupcake.   

Happy baking!

Tuesday, March 6, 2012

DIY Ice cream

So summer's around the corner!e. And my craving for ice cream (or anything cold really) is genuine. And I just go crazy when I hear Mamang Sorbetero's bell ring.

Photo from: https://www.facebook.com/pages/Dirty-Ice-Cream/54519711375

Our Mamang Sorbetero's ice cream can be sold in three different ways.

First, cone. You can get the regular cone or the wafer cone. The wafer cone is a little more expensive than the regular cone.

Photo from: http://coffeemakesmeweak.wordpress.com/2010/11/06/guilty-pleasure/

Second, cup.

Photo from: http://sketchingmycorner.blogspot.com/2010/02/ice-cream.html

And bun.

Photo from: http://www.ourawesomeplanet.com/awesome/2009/12/dirty-ice-cream-burger.html

All of them very delicious of course! The usual flavors are chocolate, cheese and strawberry. If you're lucky, they have mango, avocado (yum!) and even cookies 'n cream just for Php10-15. Gone are the days when you can get it for Php5. I feel old.

Weeks ago, I wanted my dirty ice cream fix. And I thought it was fated just when I heard one of the Mamang Sorbetero's rings. I called him out excited and all but he must be deaf because he just walked away. I wanted it so bad. I sat back in front of my computer and figured, if he's not giving me my fix, I'm making it myself!

I've searched the internet for easy, simple ice cream recipes and I came across two that were simple enough. One only had one ingredient, the other had two. Hard work (research) pays off.

So you may be asking how one can make ice cream out of one ingredient? This one is easy to guess if you've watch Rachel Ray in Food Network because they've featured this before. It's awesome. And so the secret ingredient is...

Photo from: http://karlasnaildesign19.blogspot.com/2011/03/bananas-in-pyjamas.html

If you've guessed bananas then you definitely got it right! Thanks to our vegetarian brothers and sisters of the world, this was invented. It's easy breezy also. All you got to do is look for OVERRIPE bananas, cut them up, freeze them for about two hours and put them in the food processor and puree away! Instant healthy ice cream! You can check out the detailed instructions here

It was a mishap when I first tried it though. I call it over-excitement. I didn't really read the instructions through and so, I placed the bananas with their skins still on overnight. The next day I couldn't peel the skin off. I had to slice the sides and boy was that hard. I was scared I'd hurt my fingers. It did okay in the food processor though. I use Moulinex's Food Processor. Does a fine job.


Another thing though was I didn't really wait for the bananas to go overripe because I'm way to excited so my wonderful sundae tasted really like bananas and they weren't sweet enough that my mom had to add Milo to it to make it taste better. But wait until next time. I'll get it right.

On to the second recipe! And this one I love, it only uses two ingredients; 2 cups heavy cream and 1 can of condensed milk. You just whip the cream until there are soft peaks and then fold condensed milk. You can check the other flavors you can make with this recipe at this site. They have really awesome flavors! But really it depends on your imagination.

What I did with mine was add two more things; bananas and melted chocolate. I had bittersweet and semi-sweet chocolate bars left in my pantry that were just going to expire if I didn't use them. So for my anti-hoarding chocolate bars movement, I melted one bar, used half to make chocolate-coated cereal (makes it easy to eat healthy cardboard) and the rest I placed in my ice cream. I also added pureed bananas because as I mentioned earlier, I placed all the available bananas in my freezer. I had to find a better use for them.

So to add different flavors what you do is mix it with the condensed milk first before mixing it with the whipped cream. Then after 6 hours of painful waiting, there you have it your own ice cream!

Oh by the way, I didn't really use whipped cream for this one. Instead, I used chilled Nestle's all-purpose cream. It does the job, it's more economical. I just had my KitchenAid mixer do the whipping.

From: http://theprudentpatron.com/2011/11/hot-kohls-kitche-aid-mixer-only-149-99-get-45-in-kohls-cash.html
Best investment, EVER!

I'm not really a fan of chocolate in baking and ice cream. I like it as a bar and ready to chomp but as far as this ice cream recipe goes, my mom loved it. Commercial ice cream tends to be airy unlike homemade ice cream that's creamy and wonderful and dense and filling. My new found friend who tasted it commented that it was amazing because the ice cream I made did not melt so easily. I think I made a mistake because the instructions say to whip the cream until it reaches a soft peak. I whipped it until it was stiff. My bad. But hey, worked for the best! So that's the trick for a longer lasting compact ice cream!

If you are watching your weight, the minimum calories of vanilla ice cream (the base cream + condensed milk recipe just add vanilla essence) is 145 calories per half-cup serving, which you can burn if you clean up the house for 45 minutes while you wait for your ice cream to freeze.

So the next time you have an ice cream craving, satisfy it with your own creation. Go crazy with your own signature flavors. Have fun making it and eating it!