Thursday, June 29, 2017

Mousse-y Tablea Flan Recipe

I've been working on my leche flan game when I remembered that I have posted one here. I did a few revisions for it like using coconut sugar for both the flan and the syrup this time. Coconut sugar is a local, organic and healthier alternative to artificial sweeteners. Relatively lower in calories compared to refined sugar, coconut sugar is perfect for weight watchers. It also contains dietary fiber. Sounds like a win to me! 

MOUSSE-Y TABLEA FLAN RECIPE

Ingredients: (Makes 2 llaneras)

For the Flan:

1 can of evaporated milk (370 ml.)
60 g. Batangas Tablea (Get it from us at www.herbalandherbs.wordpress.com)
100 g. coconut sugar 
3 whole eggs
1/8 tsp. of organic vanilla
pinch salt

For the syrup:

60 g. coconut sugar
60 ml. water

Instructions:

1. Tablea-Milk Mixture. Simmer evaporated milk and Tablea in a saucepan. Stir continuously to prevent milk from curdling until Tablea is dissolved. (Note: Since we use traditional Tablea, expect that there will be Tablea grains and sediments.) Cool for about 30-45 mins. 


2. Sugar Syrup. Prepare syrup by mixing together coconut sugar and water in another saucepan. Keep stirring at low heat to prevent coconut sugar from burning. You'll know it's ready when your sugar syrup spins a thread when it drops from a spoon. Cool for about 30 mins. before transferring to llaneras. 


3. Flan. Mix Tablea-Milk mixture with the rest of the flan ingredients (coconut sugar, eggs, vanilla and salt). (Shortcut alert!) I like putting it in our blender and just mixing it until it looks incorporated. To rid of air bubbles, just strain the flan mixture using a sieve. Easy peasy. Pour flan mixture in llanera. Cover with foil.  


4. Bake. I bake my leche flans for 50 minutes at my 190°C pre-heated oven. I put the llaneras on a jelly roll pan (any bigger pan is fine as long as they fit) with about half an inch of water. This method is also called the water bath (bain-marie in French). This trick is used in baking cheesecakes to keep the surface of the cheesecake smooth. You can also opt to steam the leche flans for about the same time. To check if it's cooked through, do the toothpick test. Flan should be jiggly. 

5. Cool. Cool leche flan at room temperature for 1 hour before refrigerating. I recommend at least an hour or two of refrigeration before serving. When flipping it over, remember to loosen the sides first with a butter knife. Enjoy!


The consistency of the flan is mousse-y (think chocolate mousse here). As for the taste, I think my mother describes it best when she said it neither has a sweet nor bitter (from Tablea) aftertaste, it's just right to enjoy the true flavor of chocolate.  

But biases are always awesome (ha!). Try out the recipe and let us know what you think. :)     

P.S. You can also get coconut sugar from us at Php350/kilo (180 for 500 g). It retails at Php90 in super markets for 200 grams. 

Wednesday, February 3, 2016

How to Make Your Own Gugo Shampoo (with step-by-step pictures)

Been wanting to make your own natural Gugo shampoo? Here's how!

What you will need:

1 Gugo bark
300 ml. water
Clean bowl
Spoon
Kalamansi
Strainer
Clean recycled shampoo bottle

Optional: 1/8 tsp. Cinnamon

What to do:

1. Get a Gugo bark and cut in half.


Want your own Gugo bark? Get it at https://herbalandherbs.wordpress.com/


2. Measure 300 ml. of water and put in a bowl.


3. Put Gugo in the water and leave for an hour. (You can put half the bark directly or cut it in smaller pieces like below.)


4. After an hour, you should see some suds. Pick the Gugo with your hand and squeeze to create more suds. 


5. Add the juice of 1 kalamansi and mix to incorporate. (Optional: You can add cinnamon like below. Mix after addition.) 


6. Transfer to a clean recycled shampoo bottle. Shake before using. Shampoo as usual. Keep away from eyes.


Shampooing with Gugo may take some getting used to. You can add a few drops of your shampoo to your Gugo mix until you get used to it. This Gugo shampoo recipe can last for about 1-2 weeks.  

Unused Gugo bark can last for 1 year. Just make sure it is stored in a cool, dry place. Preferably wrapped in plastic to keep the dust off.

Want your own Gugo bark? Get it at https://herbalandherbs.wordpress.com/

Tuesday, December 8, 2015

The Origin of Gugo

Have you ever wondered how Gugo is made?

I have been very blessed to meet some of the makers of Gugo in Batangas.

In this small town, it seems everyone knows how to make Gugo! They were so nice, they even showed us how they make it.

Gugo starts from a bark harvested from a vine that may only be found in mountainous areas.

Gugo bark


After the bark is skinned, it is cut into strips like below.

Gugo strips


It is then hammered into rectangular strips.
Nanay Berning Suarez showing us how Gugo is shaped. 

After being sun dried, it is then sold as dried Gugo strips. Drying takes a minimum of 5 hours depending on the weather.


Do you notice how these two sets of gugo differ in color?

According to one of the makers of Gugo, the color depends on what tree the vine was next to.

The light colored one came from a vine which grew near an Indian Mango, while the darker one grew next to a santol tree.

They may differ in color but they are just effective in helping you care for your hair.

So, which color do you like better? Let us know! :)


Order your Gugo from us! 


Leave us a personal message at our FB page: https://www.facebook.com/HerbalnHerbs,

Monday, April 6, 2015

An Eggziting Way to Remove Blackheads

It is an enigma to me too why it took me this long to post about this, especially when I practically do this every two weeks (sometimes weekly if my blackheads are going Spartan army on me.)

I once removed my blackheads using Nu Skin. (You can check the post here.) But I have long abandoned it because I opted for a more natural, if not more organic, facial care. But it’s really mostly because it’s the cheaper option (let’s be honest). It’s just as effective without the cancer-causing agents in tow. So, why not right?

So how does one remove blackheads without store-bought face masks (which don’t work on me) and without going to facial centers that uproot blackheads through pricking and squeezing? Ouch!

Well, it is closer to you than you think.

Image from: www.rsc.org


You will need the following:
An egg
A sheet of toilet paper
Scissors
Soap
Ice cubes

Directions:

1. Separate the yolk and the egg white, and then get about a teaspoon of egg white. (This depends on the size of your face. I have a lot of leftovers when I use 1 teaspoon.)
2. Next, fold a sheet of toilet paper in half so that it forms a triangle. Cut it in the middle. One ply of this paper triangle will serve as your nose strip.
3. Wash your face with gentle soap and pat dry.
4. Apply the teaspoon of egg white on your face and your neck using your beauty fingers. Making sure you only apply it upwards to avoid wrinkles.
5. Slowly dab your makeshift nose strip using your fingers. You need to be very gentle when you do this because you might destroy the toilet paper.
6. After applying the nose strip, apply a second coating of egg white on your nose.
7. Let it dry. This will take about 30 minutes. Try not to move around so much or else the mask will crack. If air enters the mask, it might itch.
8. When it’s all dried out, slowly pull your nose strip. I pull one side at a time
9. You can repeat this again if you have more blackheads left (also known as Spartan mode), but just limit it to thrice in a row. If you are satisfied the first time, you can wash your face and apply the ice cubes on your face. This will close your pores and prevent dirt from coming in, at least temporarily.

Put the leftover egg white where you dipped your fingers in your plants. It makes a good fertilizer.

As for the remaining egg white, you can store it. It usually keeps for a few days in an airtight container. I personally prefer to cook it with the initially separated yolk, and crack open a fresh every time I extract my blackheads.

If you want to use free range eggs, that’s so much better! Free range eggs do not have hormones in it.

Let me know if this works for you!

Tuesday, May 28, 2013

DIY Pili-Basil Pesto

My parents are having a pot luck tonight. And with the thick patch of Basil growing in their Herbal & Herbs garden that need trimming, it was quite obvious to me what they were going to ask me to make. Why, Pesto, of course!

Below is a step-by-step procedure of how I make Pesto. I don't really have a recipe for this. I pretty much just eye balled it. And you can do the same. The secret is to add ingredients slowly.

What you will need:
Basil
Pili Nuts (Optional)
Olive Oil
Garlic Cloves
Salt & Pepper to Taste
Food Processor

Procedure:

For Basil:

A. Wash Basil Leaves: Put Basil leaves in a bowl full of water mixed with salt. Leave it for 5 minutes. Rinse with water and put in strainer to dry.


B. Remove the stems after air-drying it.


Get your Basil at Php60/seedling. Visit https://herbalandherbs.wordpress.com/ for more details.


For Pili

They usually use Pine Nuts for Pesto on TV but since I don't have Pine Nuts and I do have Pili Nuts, I decided to substitute. Pili has a lot of benefits. Not only does it taste good, its also good for the digestion and bowel movement guaranteed!

A. Remove the Pili Skin: Add hot water and let it sit for about 15-20 minutes. You can easily remove the skin with your fingers then and it won't burn your fingers too.


This is what it looks like after it's skinned. I used about a little over 1/8 cup of Pili here. 


B. Toast Pili Nuts: Heat the skinned Pili in pan to push its healthy oil goodness out like so.


It's done when it looks like this:


For Pesto

A. Add all ingredients in Food Processor. If you have a small food processor like mine, don't fit all the Basil leaves at once. Put in about 1/3 of it first. It will reduce as it is processed and this ensures that everything is chopped up nicely.


Like I mentioned at the start of this post, I don't really have a recipe for this. I just really eye balled it. So if you're going to do it this way too, just add the olive oil slowly and keep checking the consistency of the pesto. And make sure you taste it so you'll know if it needs more salt. 

You have the option to add cheese to this but I really prefer to keep it flexible. If people want cheese on it, they can add it themselves. You can always serve grated cheese on the side.  

To be honest, I am no cook (my friends can attest to my cooking skills). But this just proves to us that fresh ingredients can make the difference. Try it out yourself!


Want to know where to get fresh Basil? 
Visit us at https://herbalandherbs.wordpress.com/ for more information on our kitchen herbs! 

Wednesday, April 17, 2013

The Truth About Lessening Shampoo Use

Image from: www.naturallythinking.com


If you've read Make Your Own Gugo Shampoo, you'd know that my mom is successful in transcending from commercial shampoo user to Gugo shampoo user, which is more natural and gentler to hair. I am not quite that successful yet.

For a D-I-Y-er, I am quite lazy. I'd rather use baking soda and water on my hair than make my own Gugo shampoo even though it's not that hard either. But one thing is for sure, I want healthy hair and I am sure that I am not going to get it by increasing shampoo use.

Unfortunately, shampooing is not something you can just stop without adverse effects. And even with baby steps, these adverse effects can be felt.

Shampoo, according to my dermatologist, is really for our scalp. It is used to remove the excess oils in our scalp that cause build-up, which later on become dandruff. But did you know that shampoo causes excessive oil production in our scalp? By using shampoo, you make the scalp dry which signals it to produce more oil to maintain its natural state. So if you've been using shampoo all your lives just like me, you've been sending the wrong message to your scalp. And not just that, you're actually overworking it. Our scalp oil is also the reason why conditioner is only placed from hair under your ears to the tips because when we comb (even finger comb) our hair, natural oil is distributed to the upper hair area.

I certainly cannot live without shampoo yet. I am very much envious of the people who can just live on baking soda and water to wash their scalp. Like coffee, water is the most important ingredient in shampooing or washing your hair and scalp. And baking soda helps make hard water become soft water, which helps hair become manageable).

I'm not quite there yet so instead, I'm giving my scalp enough time to adjust. Now, I dilute a drop shampoo in a dipper in approximately 1 cup of water before applying it on my head. Then, I massage scalp as usual and rinse.

The first week is really difficult. My scalp was way too oily and I had build-up. I read that it takes 6 weeks before your scalp can adjust to lessening shampoo use or non-use but the advantages outweigh all of these.

I am currently in my 4th or 5th week (I've lost count but I'm not turning back!) and I noticed that my hair is softer, shinier and more manageable. It even looks nicer when I style it! I notice also that I am not as prone to dandruff when weather changes. Better hair care, healthier scalp, savings, less consumption of chemical products, now that's what I call a sweet deal.

Use Beauty Fingers On Your Face

No, they are not the prettiest fingers in your hands. But these fingers are supposed to be the only fingers you use when you cleanse, tone and moisturize your face. 

If you're washing your face with your hands like what they do in commercials (using all your fingers), well, you are doing something wrong. The best fingers to touch it with are your middle and ring finger. Why? Because they don't exert as much force as the thumb and the pointing finger and definitely, gentler than your palms. 

I remember Rachel Ray featured in one of her episodes before about how one person sleeping on one cheek can deform the face as we age. The concept is the same when we apply to much force when we wash, towel dry, tone and moisturize our face. 

It will take a lot to get used to but let's be gentle to our faces. After all, our faces are our fortune. Remember, use your beauty fingers as seen below!

Image from: www.popsugar.com

Milk Sponge Bath

Image from: www.bbcgoodfood.com


We all know the benefits of milk in our skin. Applied every other day, milk makes a very mild exfoliant that you wouldn't mind slipping onto your lips. And I believe that if it's good for your face, it's bound to be great for the body.

I know what you are thinking,  a bath tub filled with chilled milk is indeed heaven but not very practical. But this doesn't mean that you cannot enjoy this luxurious treat ala Cleopatra. You can. And I might add, at a fraction of the cost.

What you will need:

Milk (Preferably chilled) - Amount will depend on you
Face Towel - Make sure it's soft!
Dipper/Bowl

Optional:

You can also add any or all of these into the milk. I added everything last time. So good!

Lemon (Lightening of skin & scars) - If you are going to add lemon, let is sit in milk for 10 minutes

Honey (Moisturizer)

Egg white (Skin lift) - Don't discard egg yolk. Mix it with the shampoo you will use for an easy protein treatment.

What to do:

1. Put milk (and other ingredients) in bowl. (Note: If you're going to use lemon, let it sit together for 10 minutes first).  
2. Let face towel absorb milk.
3. Gently apply over skin repeatedly in the shower. (Make sure you are dry when you do this.)
4. Stay marinated in milk for awhile.
5. Rinse with water, towel dry and notice the difference!

My verdict:

For me, this is the best way to express 'I love me' yet! Well, at least from the comfort of your own home.

Friday, February 1, 2013

Tighten Pores With Banana Peel!

Image from: foodfacts.mercola.com


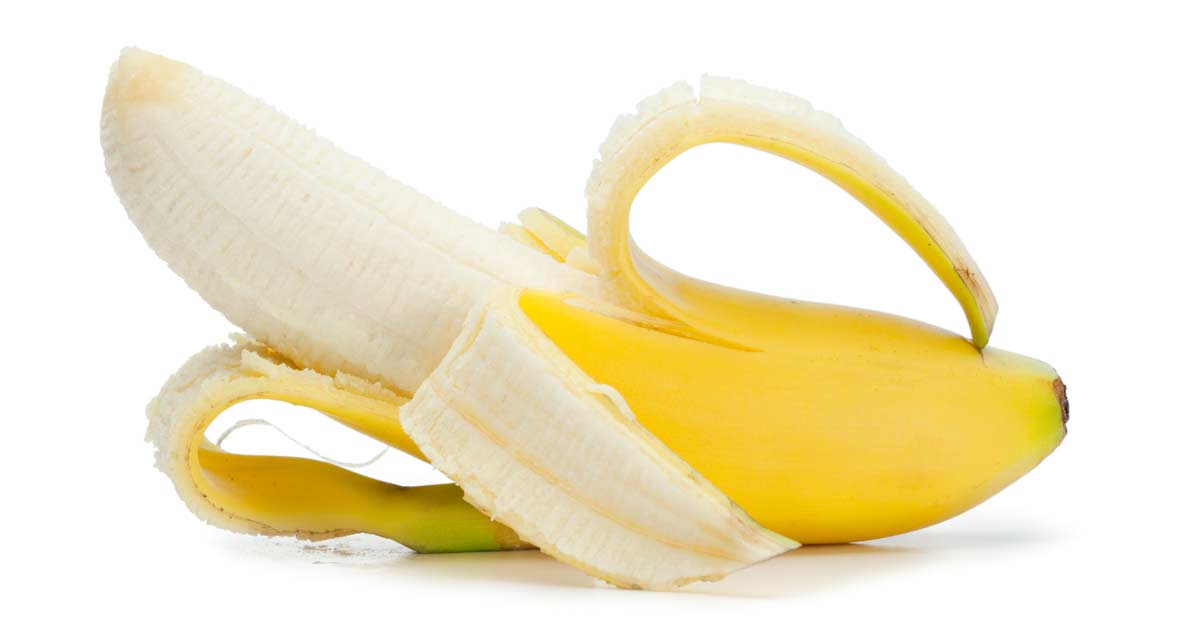
Apparently, banana peels aren't just for slapstick comedies. We have all heard about the benefits of bananas. (If you haven't, I suggest you read this article, 14 Banana Health Benefits You Might Know About). But did you know that the peel can tighten up your pores?

I was surprised when I read it somewhere over the Internet. (I'm so sorry I wasn't able to trace the link yet. I'll keep looking!) Anyway, they said that banana peels can tighten pores. I tried it myself and I'm very impressed. VERY IMPRESSED.

What you will need:

1 banana peel (Given the benefits of having banana in your diet, you might as well be the person who eats it.)

What to do:

Apply inside of peel gently all over face, especially the area where you want smaller pores. Do not rub.  Leave it for 10-15 minutes before washing face. Cleanse, tone and moisturize like usual and see the results yourself!

I have huge pores on my nose and upon doing this I observed that my pores were smaller! It's so easy, it's so worth doing! Try it and let me know how it works for you! I am so stocking up on bananas! Good for the brain too!

Say Goodbye To Dandruff With Olive Oil!


Image from: time.com


Dandruff, it’s everyone’s mortal enemy especially when you wear those slimming dark-colored shirts. And since none of us has really bounced back from our pre-holiday weight, this can be a conflict of interest. (If you have bounced back quickly, please share your secret to the rest of the class.) You may look slender because of the illusion of dark colors but you’re going to be just as insecure because of the flakes on your shoulders.  And with the bipolar weather that’s warm in the day and cold at night (at least here in the Philippines), this can be a major dandruff problem or worst the flu. But the flu’s a different blog post.  

So what’s the best solution for dandruff? Why, hot oil, of course! But I’ve always dread going to the salon except for the occasional hair cut and hair coloring because when I go to the salon, instead of feeling good about myself, I feel worst because they tell me to have my hair straightened and they enumerate all these treatments that will make it all better. Nothing wrong with up-selling but don’t make it so obvious that you only care offering these services because you want us to spend our money. Where is the sincerity?

But enough of my ranting, here are hot oil  and hair spa procedures that you can do at home that’s just as effective, not as expensive and natural! 

Hot Oil

What you will need:

Olive oil (1 tsp or more as needed)
Cotton
Hair clamp (for sectioning hair)
Kerchief you can use as head scarf

Procedure:

  1. Section hair and clamp hair that you want out of the way.
  2. Moisten cotton with olive oil and apply to scalp gently. Do this until you have covered entire scalp area. With the leftover oil, damp cotton and apply some on your hair too.
  3. Cover your head with a kerchief. Preferably, this should be done at bed time so you can leave it overnight. The kerchief is used so that the oil doesn’t go to your pillow. Don’t tie the kerchief too tightly on your head. It’s said that sleeping with your head covered is bad for the brain.
  4. The next day, shampoo twice. Dandruff will be visually reduced.


Hair Spa/Hot Oil

If your scalp needs exfoliating, this is the better recipe. 

What you will need:
Brown Sugar (1 tsp)
Olive oil (Enough to cover brown sugar)
Cotton
Hair clamp (for sectioning hair)

Procedure:

  1. Section hair and clamp hair that you want out of the way.
  2. Moisten cotton with olive oil and sugar then apply to scalp gently. Do this until you have covered entire scalp area. Focus on the areas where you can visibly see flakes on scalp.
  3. Immediately, shampoo twice. Dandruff will be visually reduced.

For better results, you can do the hot oil and do the quick hair spa the next day.

I’ve tried a lot of DIY hot oils but they always leave my hair damp for days and I have thick hair. But this one did the job and didn’t leave my hair damp at all. Definitely doing this again, with or without dandruff!